Getting paid
BlueCamroo offers invoicing that is integrated into its project management and account system. Invoicing is component-based. While each component works together as a whole, you can pick and choose which invoicing features work best within your operation.
The three main components of invoicing are:
1) Invoice generation and client notification
2) Payments (online and offline)
3) Quickbooks Integration
Invoice Generation
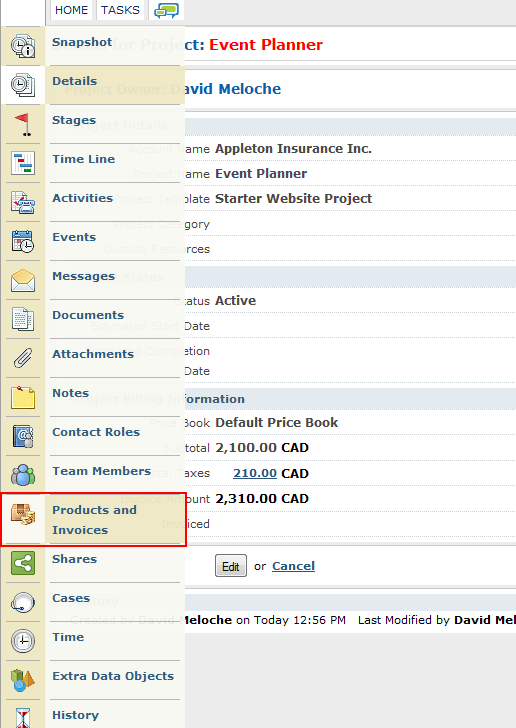
Invoices are based on products associated with a project. When you create a new project, you can add products to the project via the Products and Invoices button on the Left Pane Tool Bar.
You will also notice on the Project's Details page there is a drop-down box that let's you select the project's Price Book.

The Price Book selected controls two things:
1) Which products may be added to the project.
2) The actual price of each product.
The price book concept might seem a bit odd but consider:
1) Some projects you might want certain products never to get added to the project or (worse) be offered by a sales person.
2) You can set up products with a "rack rate" or "MSRP" and then create different price books to discount the products (or adjust the prices upwards).
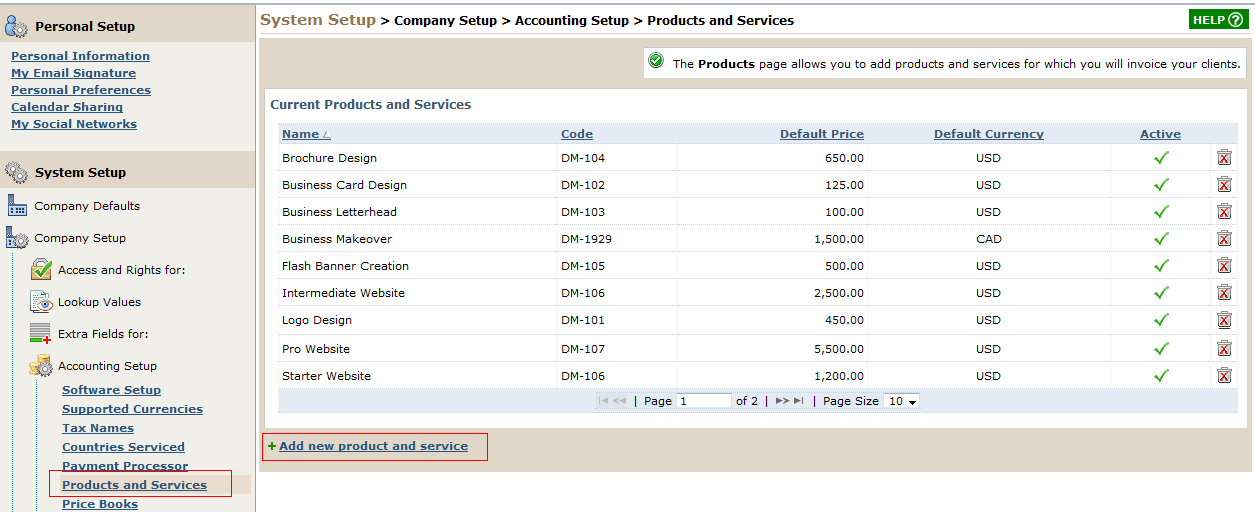
So before you create a project, remember to visit System Setup | Company Setup | Accounting Setup | Products and Services and enter your products and services.

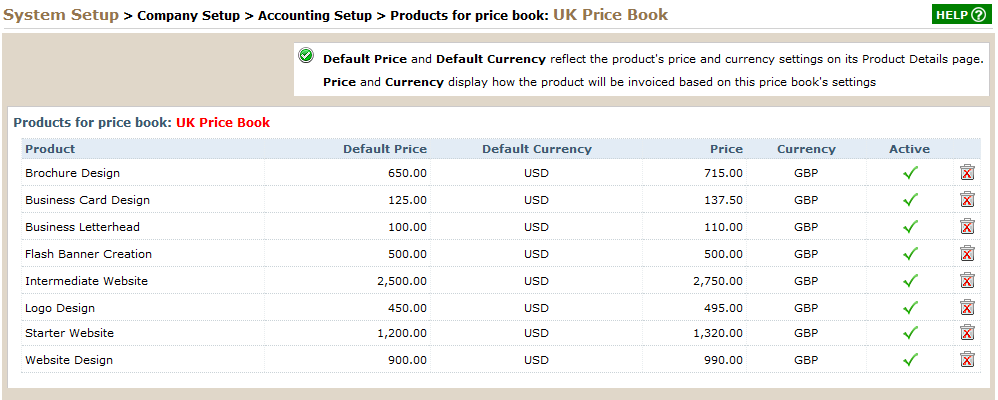
After that, select System Setup | Company Setup | Accounting Setup | Price Books. BlueCamroo initially gives you a default price book. You can create additional price books as needed. Any products you've created will be added by default to your listed price books.
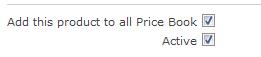
You'll notice on a products details page there's a Add this product to all Price Book option you can disable and then add the product manually to desired price books.
As noted above, if you have projects where you want to ensure some products or services don't get added to the project, you can delete the products from the specific price book. There are several reasons you might want to set this up. For example, you might have a product or software application that can't be legally sold to clients in some countries. Some products might have dangerous interactions.
So coming back around, you create a new project, select the desired price book. (If you're creating the project from a project template you can have all this work pre-set.) Selecting the price book won't automatically add all the products in the price book to the actual project.
To do this click the Products button ( ) from the Left Pane Tool Bar.
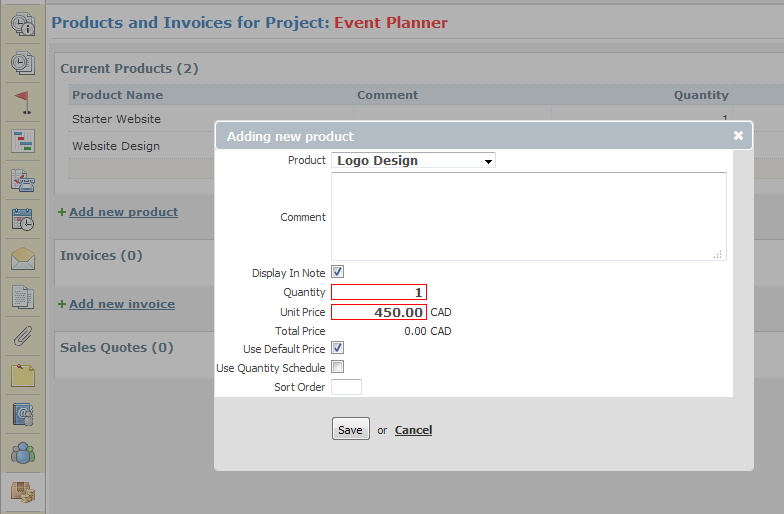
Click Add New Product and select the product from the Product drop-down box. If the product is not in the chosen price book, it will not appear in this list.

Also on the Left Pane Tool Bar you'll notice a button called Contact Roles.

Click this to setup the account contact that's going to get the actual invoice. This is optional. You should have a contact setup to receive invoices by default. However, if you want to override that, you can use the Contact Roles option.
Okay so your project is done. And it's now time to invoice the client. Click the Products and Invoices button () on the Left Pane Tool Bar. Click the Add New Invoice link.

Enter an invoice number. The Invoice Date will default to the current date but you can click on the field and select another date. The Payment Due Date will likewise default to the current date but you can set it for, say, 30 days in the future.
Ignore the Payment Amount, Payment Date, and Payment Method fields. These are completed when the invoice is paid. The Total Taxes and Total Amount will generate after you create the invoice. The Subtotal amount is the total of all products/services before tax.
Click Save and you now have your very first invoice.
Click on the created invoice and you'll see a pop-up window that looks similar to the one before but you can now add some descriptive text.

You'll also see when the system will generate reminders. You can click on a reminder date and adjust it.
Now you're probably wondering where the reminder date or dates get setup? That's a "universal" setting for all invoices and it can be configured under Setup's System Setup | Company Setup | Accounting Setup | Global Invoice Reminders.
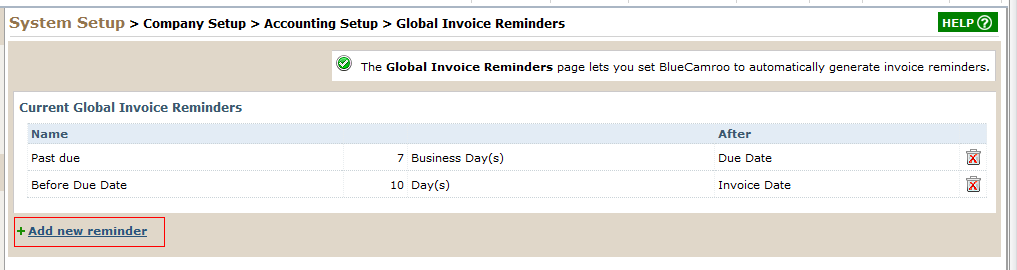
Click Add New Reminder.
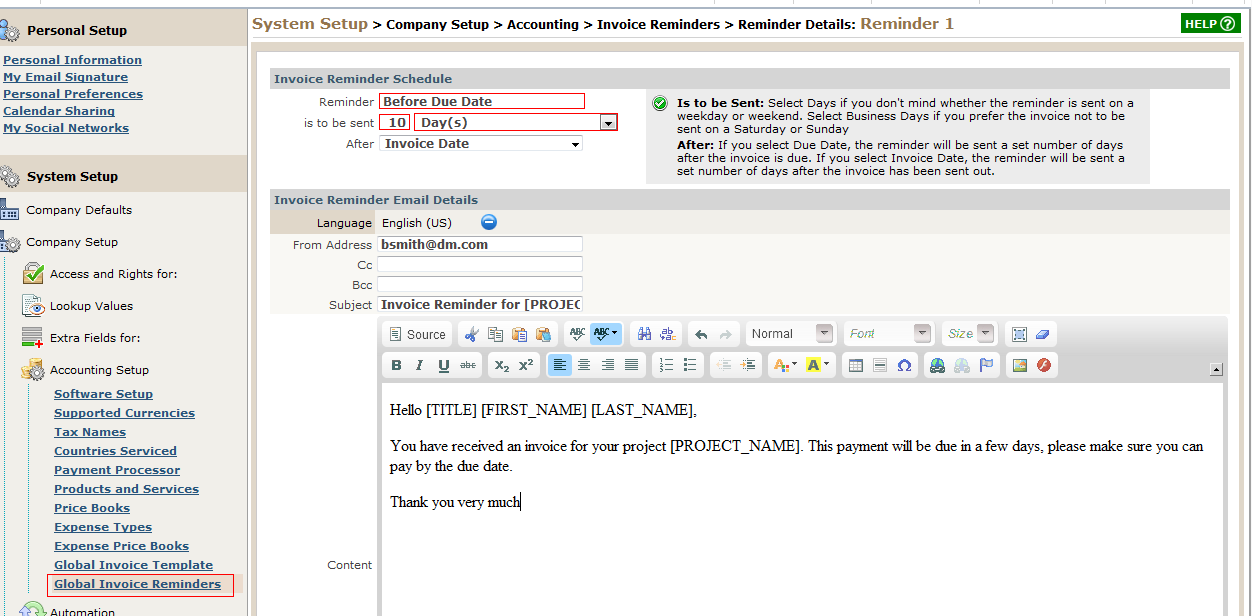
Give the reminder a name in the Reminder field. This is only for internal reference and won't appear in the client reminder. After this, you're ready to setup when the reminder should be generated.
You have two choices. Do you want the reminder to be sent some time after the date the invoice was issued? Or do you want the reminder to be sent some time after the due date? You can create multiple reminders so you don't really have to choose one over the other.
Select how many days (including Saturday and Sunday) you want the reminder to be sent after the invoice date or due date. You can also specify only business days. BlueCamroo will ignore Saturdays and Sundays in the timing.
Finally create a standard reminder email. Use the placeholders listed at the bottom of the page to personalize the reminder. Click Save and Close.
You can now create another reminder. While you don't want to nag your client too much before an invoice is due, you can, in fact, create several reminders that shoot out when the invoice slips past due.
Sending the Invoice
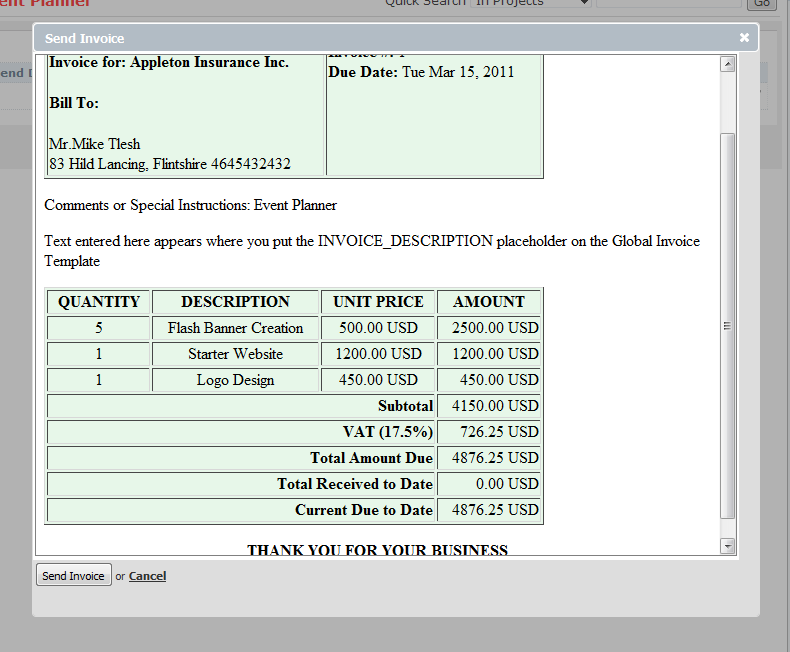
Okay so far we've created the invoice, we've setup the due date, and we've set up the automatic reminder scheme. The final step is to actually send the invoice. On the Invoices for Project page, next to your invoice is a little Send icon. Click that.

You'll get a pop-up of how the invoice will look. All you have to do now is click Send Invoice.
Now you're probably wondering how the invoice gets its format. Again we go back to Setup. Go to System Setup | Company Setup | Accounting Setup | Global Invoice Template.

You can use the WCE to create an attractive invoice. We've already done one for you but you can tweek it as you desire. Like the Global Invoice Reminders page, the invoice template uses placeholders. It actually has a larger number of placeholders. Most are pretty self evident. When BlueCamroo generates the invoice, wherever it sees [FIRST_NAME], for example, it will use the first name of the contact flagged as the one to receive the invoice.
The [INVOICE_DESCRIPTION] placeholder can be used to display the text you entered in the Description field on the Editing Invoice dialog from above.
The [QUANTITY], [PRODUCT_NAME], [UNIT_PRICE], and [AMOUNT] placeholders need a bit of detailed explanation. These placeholders are nested between two special "looping condition" placeholders only visible when you click the Source button on the WCE toolbar.

You'll see <!-- [LINE_ITEM_BEGIN] --> and <!-- [LINE_ITEM_END] -->. These tags invoke a looping condition that tells BlueCamroo to keep generating output for the tags nested between the BEGIN and END tags until it runs out of data.
For example, the [CUSTOMER_NAME] tag will only ever have one matching value for the invoice, namely the company name. However, the [PRODUCT_NAME] tag could have one or more matching values for the invoice (a client might be invoiced for several products or services). To ensure the invoice generates all product names that are invoiced, you would insert or "nest" the [PRODUCT_NAME] tag between [LINE_ITEM_BEGIN] and [LINE_ITEM_END] loop. Your BEGIN and END tags must also be set between HTML comment tags.
<!-- [LINE_ITEM_BEGIN] -->
[PRODUCT_NAME]
[QUANTITY]
[UNIT_PRICE]
[AMOUNT]
<!-- [LINE_ITEM_END] -->
If multiple taxes are levied, then taxes are another item that can have a looping condition:
<!-- [TAX_BEGIN] -->
[TAX_NAME]
[TAX_RATE]
<!-- [TAX_END] -->
Okay, clear? If not so clear, don't worry. The invoice has already been laid out and coded for you. You'll probably only ever have to modify it slightly with your company logo, colors, etc.
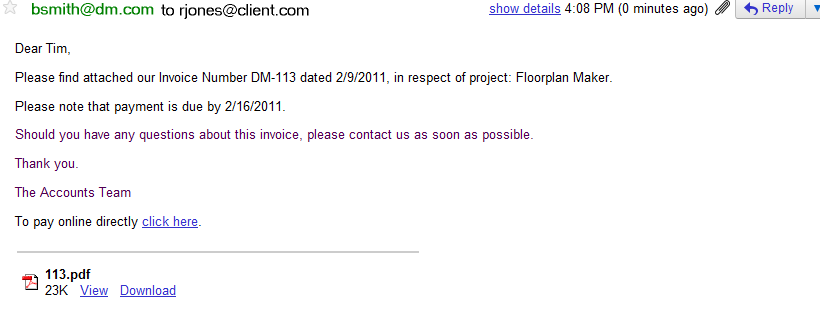
When you click Send on the actual project invoice preview, a PDF is generated of this template with appropriate data replacing placeholders will be sent to the invoice receiver contact's email.
Now you're asking yourself, what does this invoice email look like and can I customize it? This is BlueCamroo, so, of course!
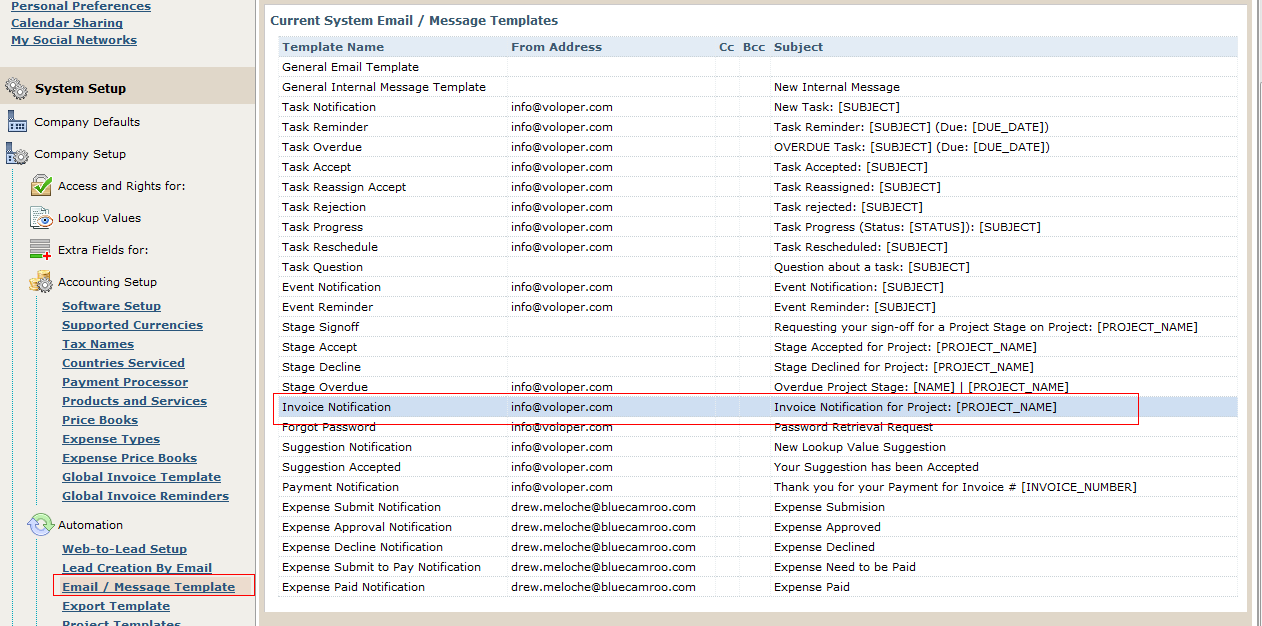
There's another template that controls the look of the invoice notification email (the one that gets the invoice PDF as an attachment). Under Setup, select System Setup | Company Setup | Automation | Invoice Notification.
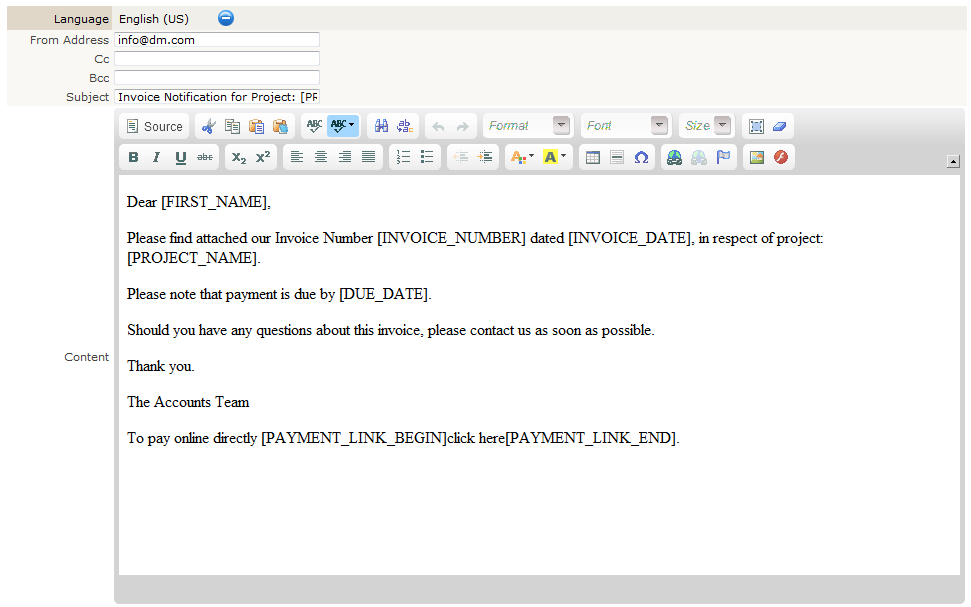
Enter your salutations and drop in your place holders. You can remind them of the due date with the [DUE_DATE] placeholder.
The next Roo blog post is going to deal with how BlueCamroo handles payments. However, because we're talking about the Invoice Notification template placeholder, I should point out some new placeholders we've added in the February 2011 release. We now have [PAYMENT_LINK_BEGIN] and [PAYMENT_LINK_END] placeholders. Any text between these two placeholders creates a hyperlink condition in the notification email that, if clicked, takes the receiver to a payment page, directly bypassing the Intranet payment login. If that doesn't make any sense to you, don't worry. Stay tuned for parts two and three next week.
- Solution
- Pricing
- How Your Business Runs
- Developers
- API Documentation

©2026 BlueCamroo Inc. All righs reserved