BlueCamroo Release Notes 2.4.0
What's New in BlueCamroo?
Since our December update, we've been doing a lot of work "under the hood" to streamline processes and to be ready for the arrival of Internet Explorer 9. But we've also been able to make time to squeeze in a host of small (and some not-so-small) improvements requested by our users. Continue reading below for a detailed overview of these enhancements.
Email that "just works"
We've heard feedback from quite a number of you that while you value the ability to forward in email and associate it to BlueCamroo data, you find the whole business of actually linking up the data a hassle. "Can't you make it 'just work'?", you ask. So, in the spirit of making it "just work", we've added a whole raft of new ways to handle email:
Sales@ – Your Customer Inbox
On your company web site, you may provide prospective customers a "sales@" email address (sales@mycompany.com) to reach you with sales enquiries. You can now "bounce" these emails to BlueCamroo and have BlueCamroo create leads, contacts, and support cases from them.
Create Leads
When you receive an email from a new lead, just forward it to your new "sales@[domain].bluecamroo.com" address and BlueCamroo will automatically create a Lead.
Create Contacts
That's fine for Leads, but what if you receive an email from a new Contact at an existing customer Account? No problem: just forward it to your "sales@" address, and let BlueCamroo figure out how to handle it!
Add emails to existing Leads or Contacts
Your new contact has emailed you again? Guess what: forward it to your "sales@" address, and BlueCamroo knows not to create another new Lead or Contact. It will just add the email to your existing contact (or lead).
How do I get this set up?
Before you can use "sales@[domain].bluecamroo.com" or similar email addresses, you'll need to give BlueCamroo a little information, so the system knows how you want new Leads to be created.
Under System Setup | Company Setup | Automation, you'll find a new Lead Creation by Email menu item. This option will let you set up how BlueCamroo should assign ownership of leads based upon the forwarded email "alias" (the "sales", or "info" bit of the address).
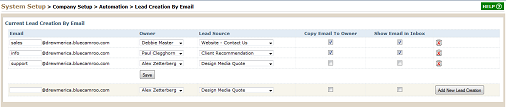
The alias can be any alphanumeric word. Email to your sales@ or info@ email boxes should then be forwarded to BlueCamroo using the following syntax:
alias@mydomain.bluecamroo.com
(mydomain should be replaced with your actual BlueCamroo domain).
How does BlueCamroo tell new Contacts and new Leads apart?
Good question, and it's helpful if you understand how BlueCamroo will process mail it receives on your "sales@" address(es). Here are the rules we apply:
If the forwarded email originally came from an email address that is already in the database, it is attached to the matched Lead or Contact. No new Lead or Contact is created.
Otherwise, if the forwarded email comes from a domain that belongs to exactly one account, a new Contact is created on that Account.
Lastly, if the forwarded email comes from a domain that is not associated to any Account – or that is associated to more than one Account – then a new Lead is created.
It's probably obvious why an email address of an existing Lead or Contact is matched, but why match on the domain part of other emails, and why the rule about matching only one Account? An example should help:
Imagine you have an account called BlueWave. There are two contacts: Bob (bob@bluewave.com) and Linda (linda@bluewave.com). When you forward in an email from ron@bluewave.com, BlueCamroo notices it is from someone @bluewave.com, so guesses (correctly!) that this is a new Contact for the Bluewave account.
Now, imagine instead that Bob and Linda's emails were bob@gmail.com and linda@gmail.com. In fact, BlueCamroo already holds a list of common web mail providers such as Gmail, so when it sees a new email from david@gmail.com, it's not going to assume he's associated to Bob and Linda; David will be added as a new Lead. But as a backup, BlueCamroo also checks to see if "@domain.com" appears on more than one Account. If it does, BlueCamroo knows not to try to guess which Account to create a new Contact on, and will create a Lead instead.
You promised me email that "just works". I still have to forward stuff!
BlueCamroo accepts emails that you forward, and emails "directly" from outside. To make a fully "no-touch" system, either:
a.Create a Rule in your email system to automatically forward emails from sales@mydomain.com to sales@mydomain.bluecamroo.com, or
b.Create an Email Alias on your Email service to redirect sales@mydomain.com straight to your BlueCamroo "sales@" address.
support@: Case Creation By Email
If you forward an email to support@mydomain.bluecamroo.com BlueCamroo will now create a Case.
Note that the "support@" address is pre-defined; you do not need to create it.
Tip: You can build Workflow Rules on new Cases to acknowledge your customer's inquiry, and to make sure it is followed up effectively.
Controlling Reply Emails
Currently, when you send an email from BlueCamroo and the recipient replies, their reply is filed in BlueCamroo, you get a copy in your regular email account, and you do not see the email in the "Inbox" section in BlueCamroo.
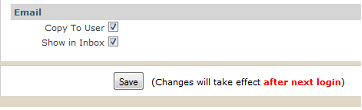
Some people would like BlueCamroo to handle reply emails differently – for example showing in Inbox, or not forwarding – so new checkboxes have now been added to the Personal Setup | Personal Preferences and Company Details | Organizational Preferences setup page to give you full control.
A Copy to User option lets you choose whether reply emails should forward to your regular email address. A Show in Inbox option lets you have the reply display in your main Home tab InBox in addition to the lead/contact/account message box.
Drop Box
While your new "sales@" address(es) will automatically attach emails to a Lead or a Contact, you may sometimes still want the original BlueCamroo mail processing, that lets you associate an email to a Project, an Opportunity, a Case, etc. Email forwarded from your external email client to email@mydomain.bluecamroo.com will still come in to your Inbox on the home page to be handled as before. This mail is now displayed in a separate "Drop Box" area, however, to distinguish it from Replies and other inbound mail that you don't need to file.
Separate section for Draft emails
As well as separating out your "Drop Box" emails, you will also find a separate section for saved Draft Emails in the messages section in your home page.
task@ and todo@
Not new, but just to complete this section on email handling, remember to use "task@" and "todo@" as quick ways to submit Tasks and To Dos into BlueCamroo when you're out and about.
User Interface Changes
This month's release marks the start of what we intend to be an ongoing process of "polishing up" the BlueCamroo user interface. We're not planning any big changes at present, but we will be working hard in each release on removing "clutter" and simplifying key system interactions.
Key changes with this release are:
De-Cluttered Right Pane
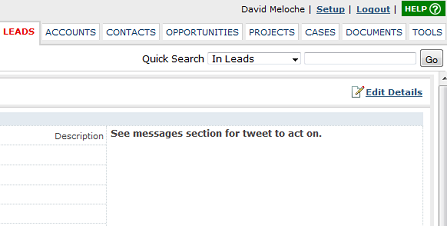
The right-pane Summary display has been modified to hide any uncompleted data fields, so that you do not see labels with missing data. Additionally, email addresses, web addresses and phone numbers have been replaced with links that let you send email, visit an associated web site, or open a call page.
View Mode on Details Pages
Watching a number of users working with BlueCamroo "in the wild", we noticed that mostly they were adding and changing Task information. Leads, Accounts, Opportunities etc seem to be viewed far more often than they are updated. So it dawned on us – why do we show you a data entry form every time if you're mostly just viewing data?
This release, therefore, introduces a new default view for Details Pages, which is a "View Mode" without data entry fields, and with a new, easier-to-read layout. To edit data, just click the new Edit Details link at the top of the details page or the Edit button at the bottom of the page to display the data in a traditional form view.
New Fonts
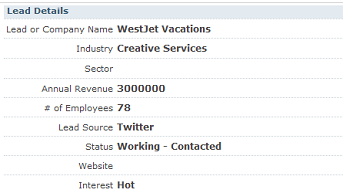
All across BlueCamroo, we've reversed the fonts used for labels and data. Previously, field labels were in bold font, and the data was in normal font. This is now reversed, so that your data is more prominent on the page.
New Content Editor

We've updated the Content Editor used across BlueCamroo for Email and other tasks. The updated Content Editor will ensure compatibility with the upcoming release of IE9. It also provides additional benefits for users on all browsers:
Buttons on the tool bar are more logically grouped.
There's a new Spell Check as You Type button that lets you have the Content Editor immediately flag misspelled words.
For those that like to fine-tune their content in "Source view", the Content Editor is less prone to interfering with your HTML.
We think it's prettier, too!
Warning to Save Data
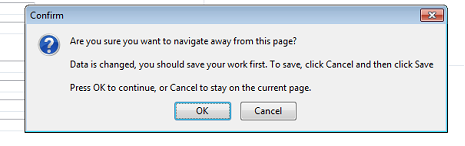
If you've not saved information on a Details Page, BlueCamroo will now warn you to save your work or lose it if you try to navigate away from the page.
Extra Fields Setup
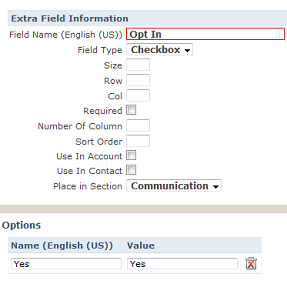
We've replaced the matrix format for creating extra fields with an individual details screen for each extra field.
Extra Fields for Time Sheets
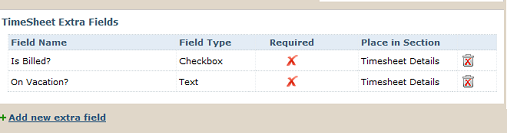
You can now create extra fields for time sheets, enabling you to define, track and report multiple categories of time as you require.
Projects
We've had feedback that some users were finding the setup pages for Project Templates hard to navigate, particularly with the Stage Signoff Details included in the Stage Details. Additionally, some Project Managers have reported that their team members have been confused by seeing Dependent Tasks that are not yet ready to start, because they are waiting on a predecessor task that is yet to complete. We've worked to address these two issues, and a number of other small changes:
Project Stage Setup (Project Templates)
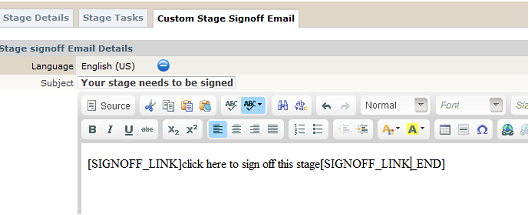
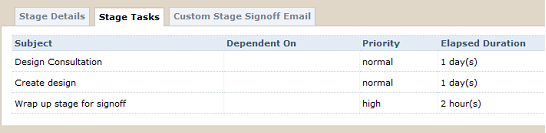
The setup for a Project Stage has now been split into three tabs, by moving Custom Stage Signoff Email to a tab on its own. This makes the interface easier to navigate, but does not otherwise change the functionality.
Task Duration (Project Templates)
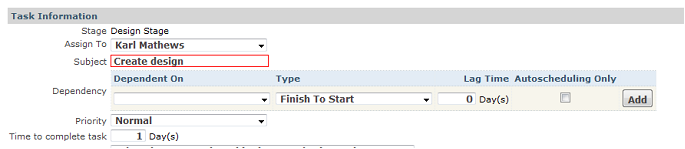
When adding Tasks to a Project Stage in a Project Template, the "Due in…." (Time to Complete Task) can now only be input in Days. Previously we allowed durations of Hours or Minutes, but this was leading to confusion where Project Managers were thinking in terms of effort to be expended in the task, not the elapsed time that should be used to calculate the assignee's Date Due on the task.
If you have any existing Project Template Tasks set up with durations in hours or minutes, these will retain their previous hour/minute settings. We do recommend, however, you access your old templates and set all Project Template Task Durations in whole days.
Date Auto-Population… Again and Again!
When a Project is created from a Project Template, you have always been able to get BlueCamroo to auto-populate the start and end dates of tasks, but only once. Now – until the Stage is published and users have access to Accept their tasks – you can modify the Start Date and re-run the Populate Dates function as often as you choose. This allows you to "what-if?" with the Project Dates until you get them the way you want them.
Dependent Task Indicator

In all Task listings, you will now start to see a new indicator that shows when a Task is unable to start because it is waiting on a predecessor task that is still to be completed. This will make it clear at a glance if a task can not yet be worked.
Dependent Task "Can Start" Flag
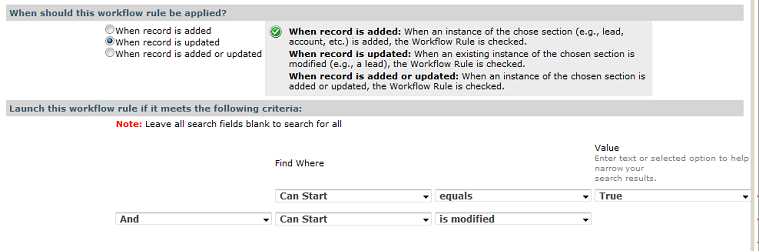
Some users have asked to be notified when a previously held Dependent Task becomes available to start. This has not been defined as a standard function of BlueCamroo, as we believe that users who regularly work their Task List will have no problem observing when a Task becomes open to work on.
However, if you do wish to do this, it is now possible to set Workflow Rules that inspect the dependent task's "Can Start" flag, and send and email when this changes.
Enable Payment without Login
BlueCamroo enables you to accept credit card payment from your customers for invoices you issue through the system. However, this has so far been restricted to your customers who have a configured External User.
Included in this release are new tools to enable you to accept payment from your customers without them needing to log in, and without you needing to configure them as External Users.
Pay without Login Template
Under Setup | System Setup | Company Setup | Client Intranet Setup we've added a Pay Without Login option. The template lets you define the look of the invoice page you're sending the client to. Add the [BODY_CONTENT] placeholder where you want the payment form to display.
Invoice Notification Template
Two placeholders have been added to the Invoice Notification Template to allow you to pass the URL to the payment page via the notification email:
[PAYMENT_LINK_BEGIN] - Invoice link begin [PAYMENT_LINK_END] - Invoice link begin
Place these two placeholders within your template. Between the _BEGIN and _END placeholders, input some "click here" type text that will be hyperlinked for the receiver.
[PAYMENT_LINK_BEGIN]click here for the payment page[PAYMENT_LINK_END]
The Invoice Notification Template page is located under System Setup | Company Setup | Automation | Invoice Notification.
Payment Page
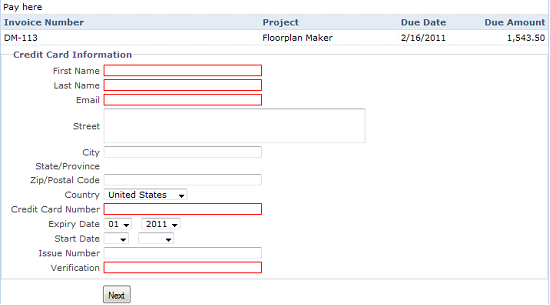
When you send the invoice via the project's Invoice button, the contact flagged to receive the invoice will get a notification email and the invoice will be attached as a PDF. If you have used the linking placeholders, the contact will also be able to click through to the payment page.
Invoice Description
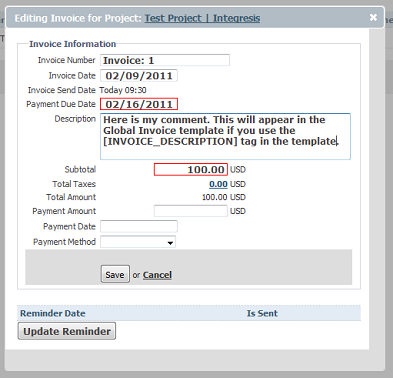
If you click on an invoice, the details dialog box now has a Description field. The text in this field can appear in the invoice itself if you use the NEW [INVOICE_DESCRIPTION] placeholder in the Global Invoice Template.
Export Templates
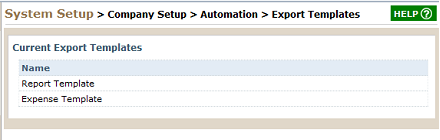
A new menu item has been added under Automation. The Export Templates menu item lets you define templates for exported Reports and Expense reports. The Report Template was previously available. However, it's been now moved under the Export Templates menu item. The Expense Report template is a new template option and allows you to define head/footer/body type layout when exporting an expense sheet to PDF.
To Dos
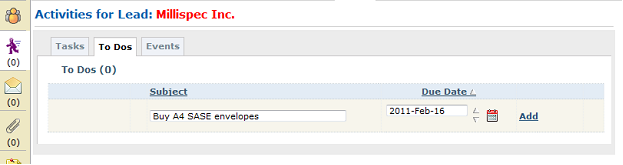
To Dos were previously only available in the Right Hand Pane and from the Home tab.
One advanced feature of To Dos is to associate a To Do List with a record such as a Lead, Opportunity, Account, etc. We've now taken this a step further, and allow you to create and access related To Do Lists from any record where you could previously access Tasks. You'll find the "To Do" tab between Tasks and Events in the Activities section for each data item.
Please note some important considerations for using To Dos versus Tasks:
To Dos are personal. You can't assign a To Do to anyone else; no-one else can see your To Dos (even System Administrators), and they are not reported in What's New.
You can't track Time or Progress to To Dos.
To Dos are quicker to add, as there's less data to complete.
You can convert To Dos into Tasks. When you do this, they will automatically pick up the related-to linkages of the To Do List in which they were created.
To Dos are handy for your own personal admin and quick actions. Tasks are more flexible and versatile
