Diving Deep into Project Templates
Most businesses work on a project basis. A project has several stages that need to be completed. Each stage is comprised of a number of tasks. Some stages cannot begin until a previous stage has been completed. Likewise some tasks cannot be completed before earlier tasks are completed. Let's consider a hypothetical example:
Building a House
Stage 1: Design the House
Stage 2: Build the House
Stage 3: Move In
Each stage is a broad end goal. It should be obvious each stage is comprised of many tasks to get you to stage completion.
So under Stage 1 we might have
1) Hire Architect
2) Review Designs
3) Approve Design
Under Stage 2 we might have
1) Buy Land
2) Build Frame
3) Put in Utilities
4) Finish Exterior
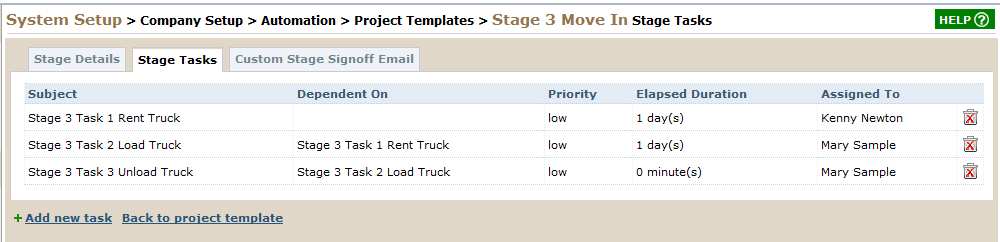
Under Stage 3 we might have
1) Rent Truck
2) Load Truck
3) Unload Truck
As we can see, Stage 2 can't start until Stage 1 ends. Stage 3 can't start until Stage 2 ends. As well, we can see each task under each stage can't logically begin until the one before it is completed.
BlueCamroo provides a way to lock tasks and stages so they can't be started until the previous stage or task has been officially flagged as completed.
Make it a Template!
Most businesses not only work on a project basis, but most projects are rarely one-off productions. Most projects employ the same stages, tasks, and timelines. Instead of having to recreate a complicated project from scratch, BlueCamroo allows you to create a template. In the template you define stages, tasks, timelines, as well as other aspects of the project like team members and products. When it's time to start a project, you just create the project from a template and BlueCamroo automatically creates the bulk of the project.
Setting up things like products and team members is fairly self-evident. However, setting up stages and tasks with dependent time lines and getting a new project to automatically populate the dates requires some discussion. So for the scope of this blog post, we're going to concentrate on creating a project template that will automatically populate deadlines when a project is created.
Creating a New Template
To create a new template click Setup | System Setup | Company Setup | Automation | Project Templates.
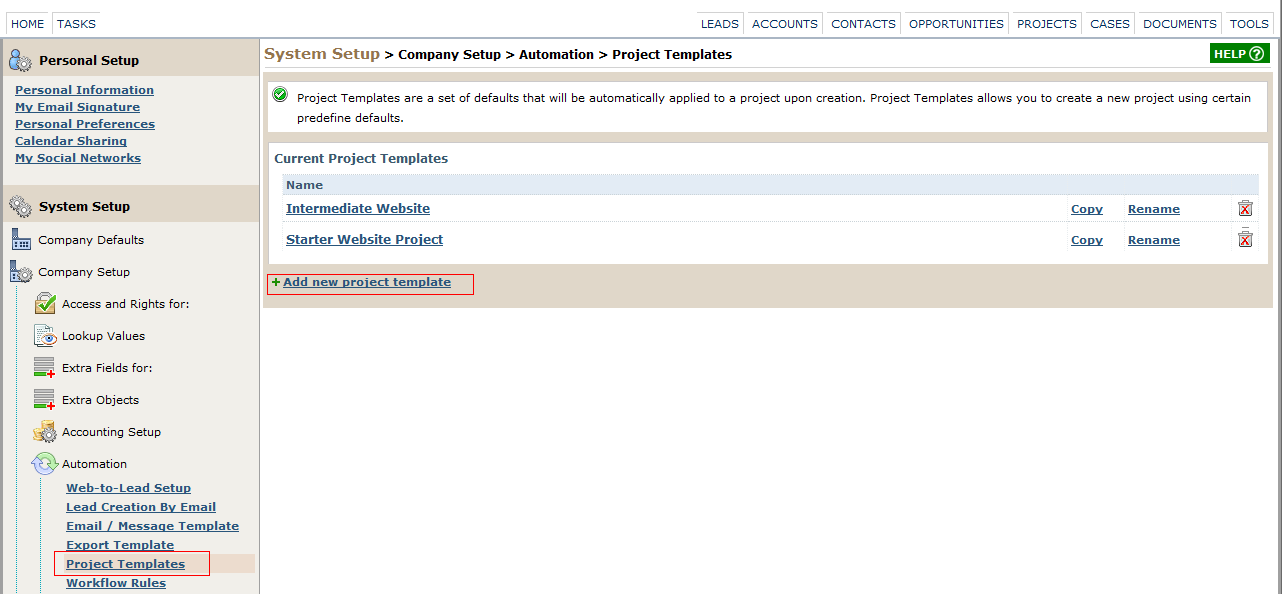
Click Add New Project Template.
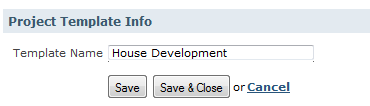
Enter a Template Name (e.g., House Development). Click Save.
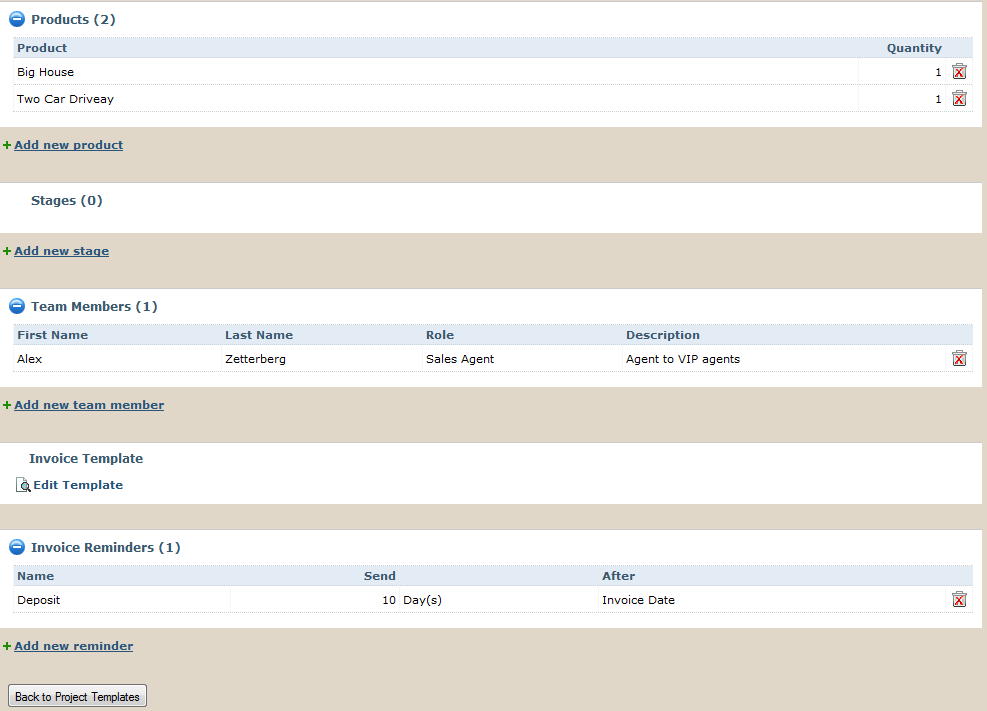
The Project Template Details page lets you define not only stages and tasks but products, invoice reminders, and team members. Products and project invoicing was covered in my series on BlueCamroo's invoice system.
For the purposes of this blog post, we'll assume you've already define these elements. To setup your first project stage, click Add New Stage.
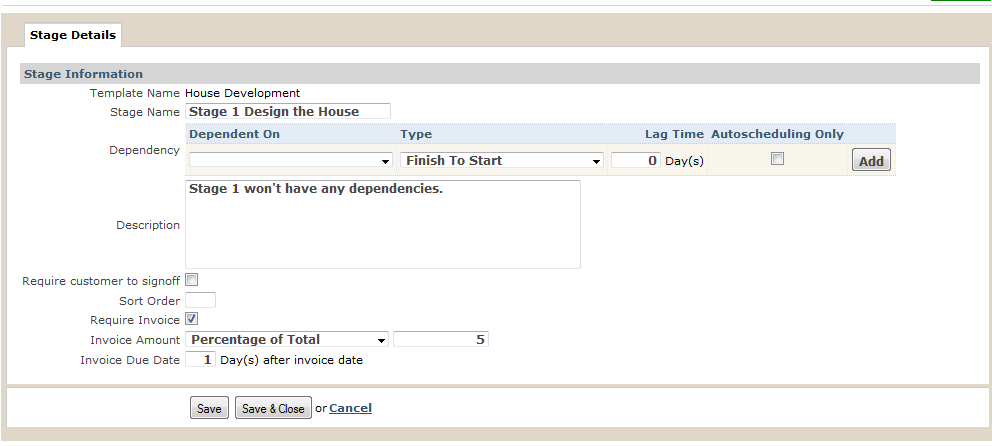
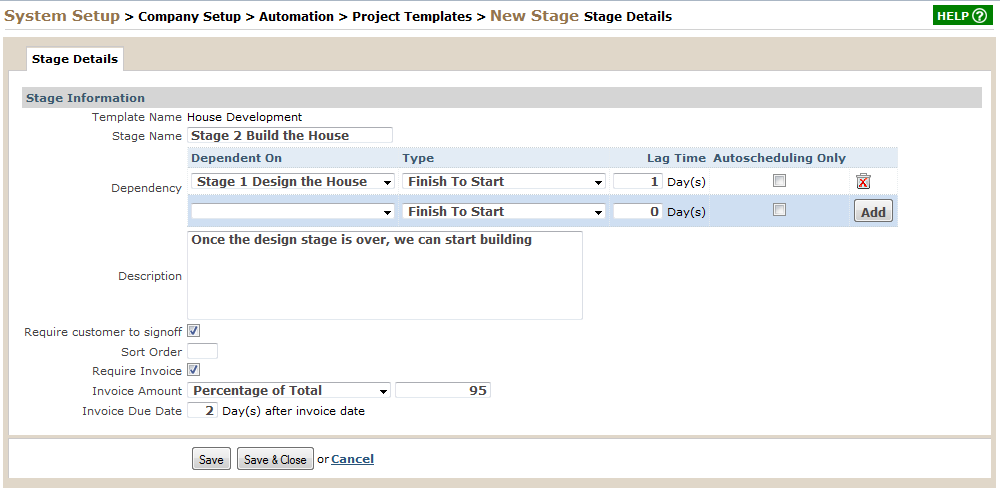
Enter a Stage Name and Description. Ignore the dependency for now. This is the first stage and logically can't be dependent on a previous stage. Check Require Customer to Signoff if you would like to generate a sign-off email to the client. The client can login via the Intranet and then electronically sign-off on this stage, verifying it's complete. If you check Require Invoice, you can actually bill either a fix value or a percentage of the invoice total upon completing of this stage. Click Save when you're done defining the stage.
After you're done, you're now ready to add the tasks. You'll notice when you clicked Save, Stage Tasks and Custom Stage Signoff Email tabs were added.

Custom Stage Signoff Email lets you customize the signoff email Click the Stage Tasks tab.

Click Add New Task.
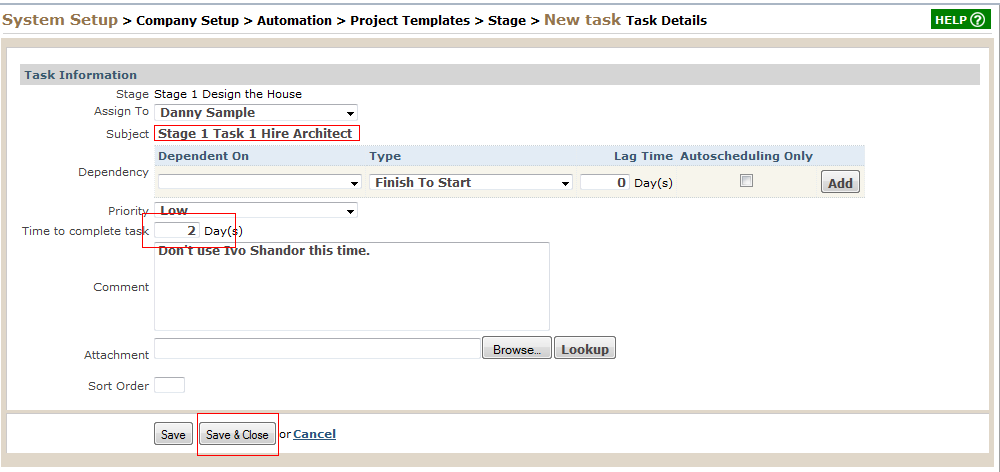
You can assign the task at this point or leave it blank and assign it upon creation. Enter the name of the first task in the Subject. Ignore the dependency as this is the first task.
Complete the Time to Complete Task field.

Enter how many days this task will stretch over. Don't try to enter the number of hours that needs to be spent on the task itself. Let's say the task will take 8 hours of actual work but those 8 hours will be stretched over 3 days. So enter 3 days. BlueCamroo uses this value to determine this task's due date and when the next task begins.
Click Save and Close when you're done
Now let's add task 2, the Review Designs task. Click Add New Task.
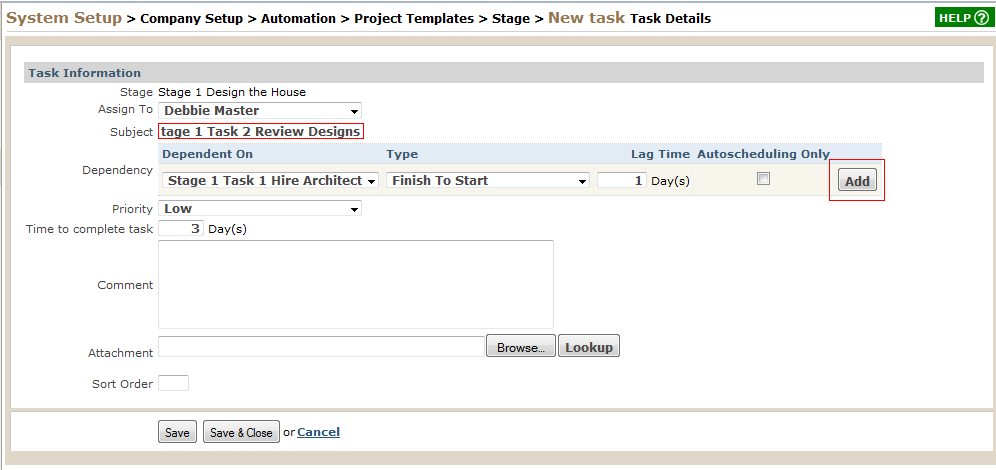
Complete it largely like the previous task. But now we can focus on the Dependency section. Select the Stage 1 Hire Architect task under the Dependent On drop-down box. Select Finish To Start under the Type drop-down box. In other words, you have to finish the Hire Architect task before you can start the Review Designs task. Add in any desired Lag Time. Hire Architect's Time to Complete Task setting plus Lag Time will determine Review Designs' automatically set start date.
The Autoscheduling Only checkbox is used if you want to create a project that uses the automatic time scheduling feature but does not create the locking conditions inherent in the dependency relationship. In other words, creating a dependency locks Review Designs, making a user unable to flag it as started until Hire Architect has been flagged as completed.
Now, this is an important step and easy to miss. You need to click Add. If you don't click Add, the dependency doesn't get set.
Complete the Time to Complete Task field. This will be used to determine Review Designs' due date. Click Save and Close.
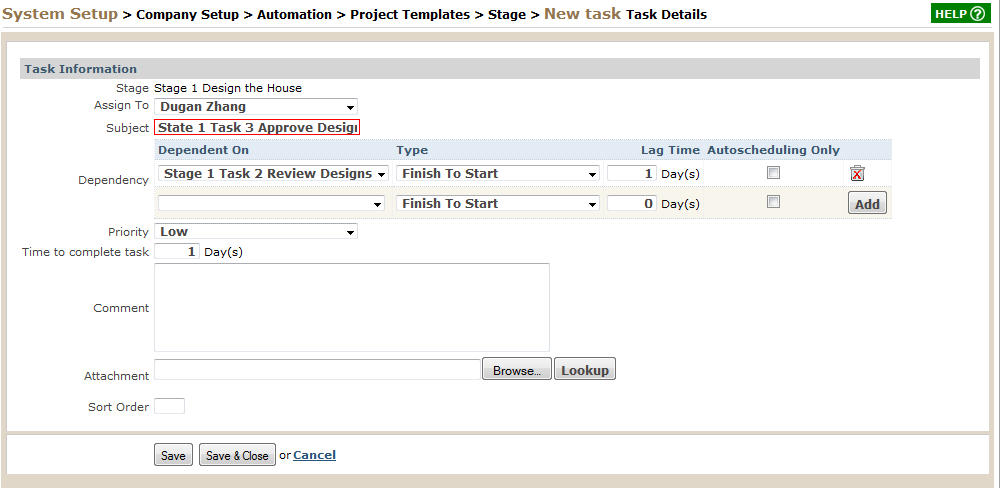
Next we'll create the Approve Design task. Add the new task in the same manner as above. Complete the dependency but select Review Designs as the Finish to Start dependency. Add in any lag time and, of course, click Add. Click Save and Close.
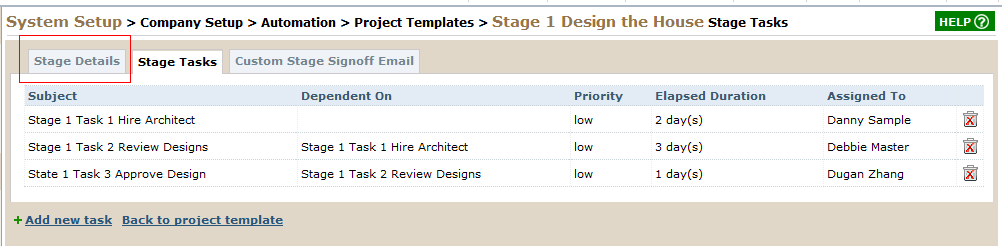
Congratulations, you've now created one stage with three tasks. Two more stages to go. To create the Build the House stage, click Back to Project Templates. Click Add New Stage.
Enter a Stage Name and Description. Now focus on the Dependency section.

Select Stage 1 (Design the House) under the Dependent On drop-down box. Select Finish To Start under the Type drop-down box. Add in any desired Lag Time. Stage 2's start date will be automatically set based on the final Stage 1 task (Approve Design) Due Date plus Stage 2's Lag Time. Of course after setting up this dependency, remember to click Add. (It's very easy to forget clicking Add. If you don't click Add, the dependency doesn't get set.) Click Save.
Now we'll add Stage 2's tasks. Just repeat the basic steps above for adding tasks under Stage 1. Assign dependencies to Build Frame, Put in Utilities, and Finish Exterior, making each task before it the dependency.

Add Stage 3 (Move In) in a fashion similar to Stage 2, making Build the House the dependency. Add its three tasks in a similar fashion.
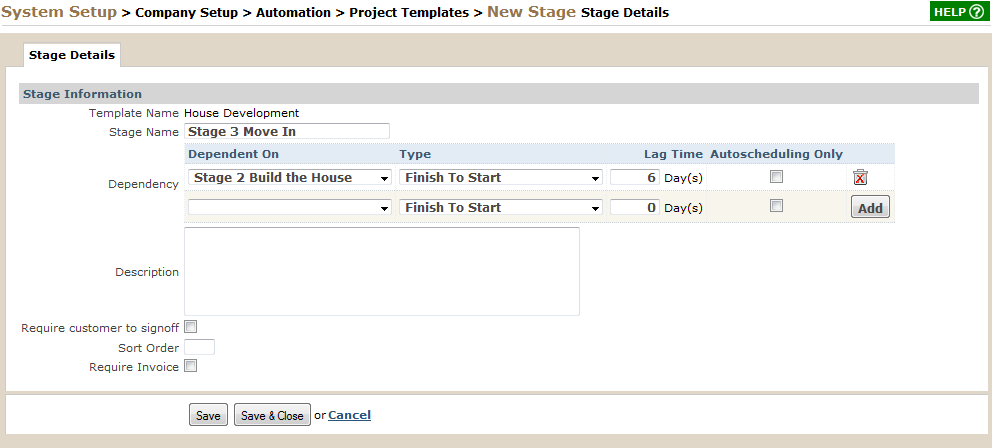
Now add all the Stage 3 tasks and the proper dependencies.
After adding all stages and their tasks, go back to the Project Templates Details page.
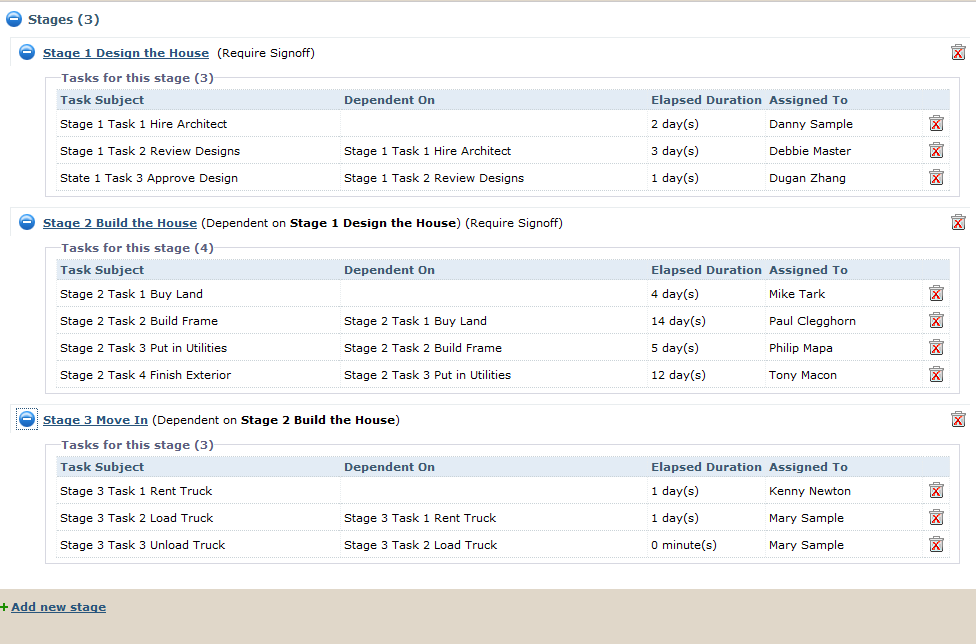
Expand all the stages and verify you have elapsed durations set and the proper dependency structure.

Creating the Project from the Project Template
Now let's create an actual project based on your template. Click the Projects tab under the main tab bar.
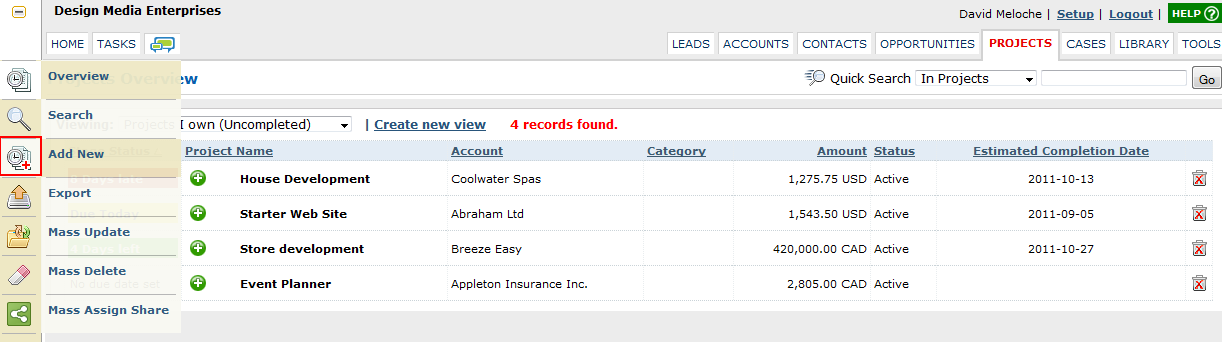
Click the Add New button from the Left Pane Tool Bar.
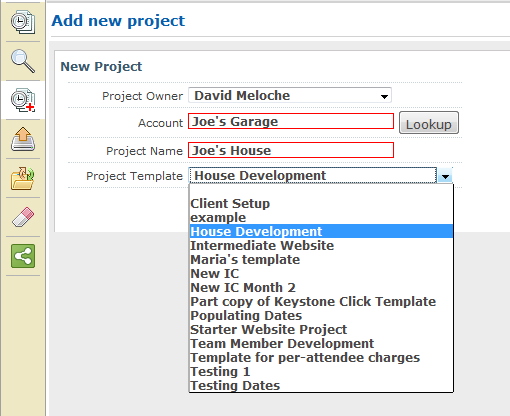
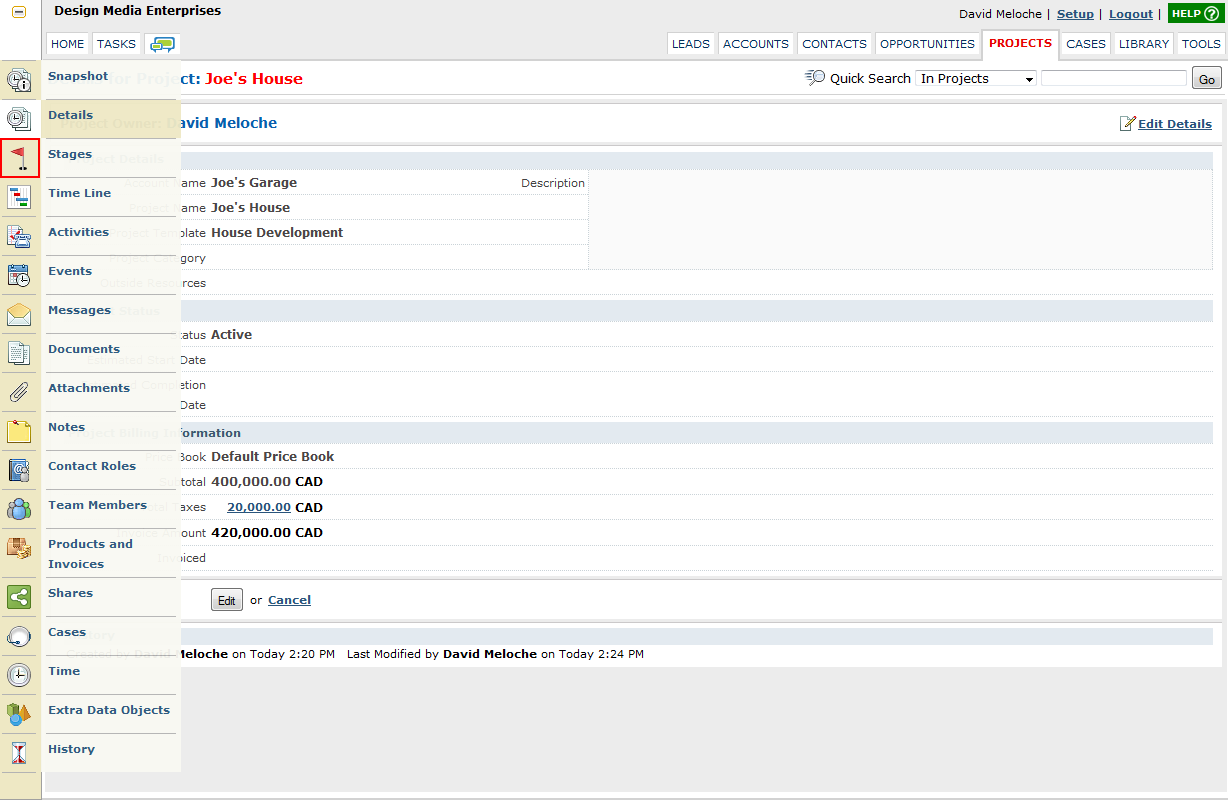
Assign it an Account and Project Name. Select the House Development Project Template. Click Create Project.
Now we're going to look at how all those dependencies, lag times, and time to complete tasks figures result in a project with automatically populated deadlines. Select the Stages button from the Left Pane Tool Bar.
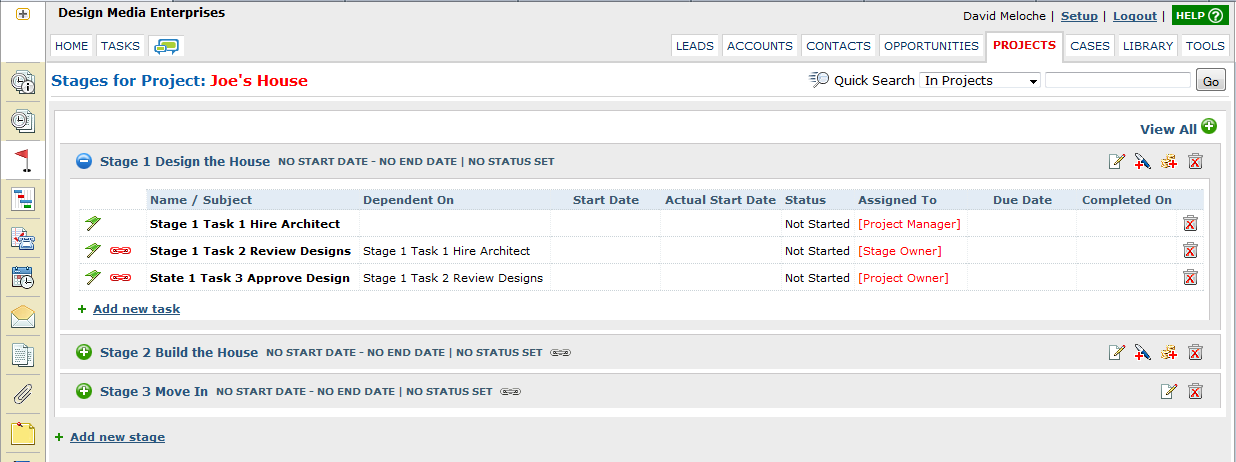
Expand  all the Stages. Click Edit
  on Stage 1.
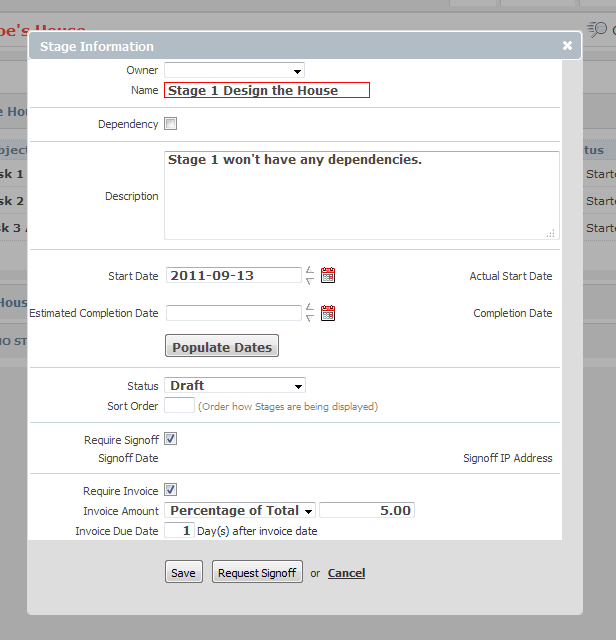
Enter a Start Date.
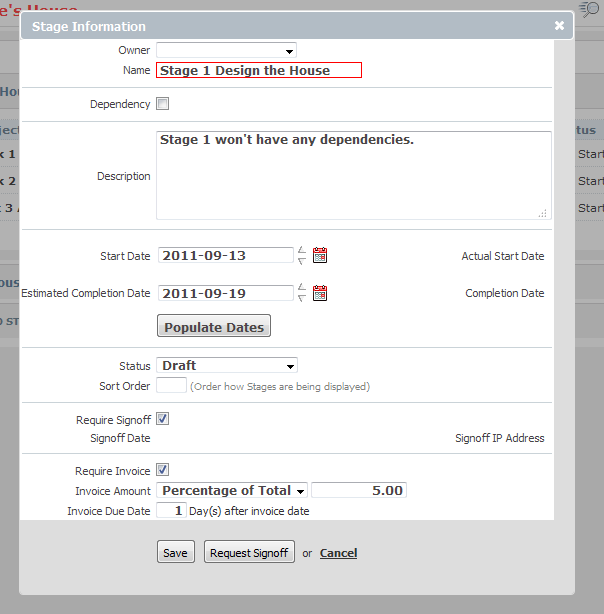
Click Populate Dates. Estimated Completion Date will be automatically filled in. Click Save.
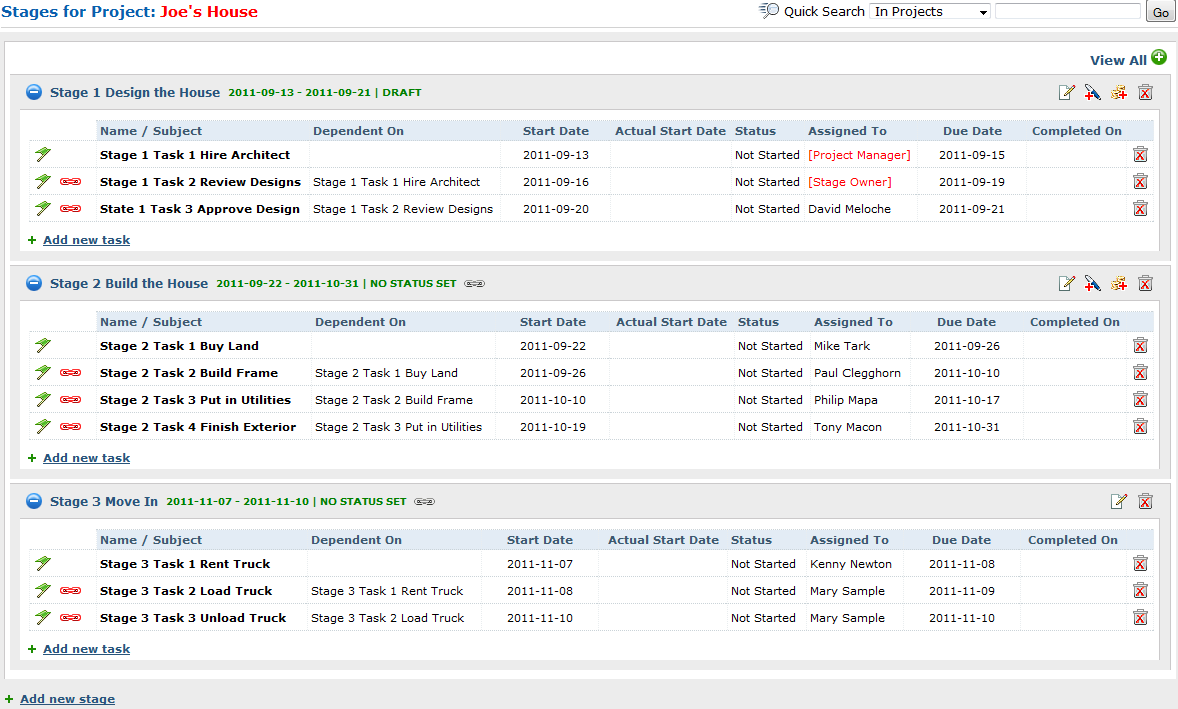
Voila. Due Dates are filled in for Stage 2, Stage 3, and all tasks!
- Solution
- Pricing
- How Your Business Runs
- Developers
- API Documentation

©2026 BlueCamroo Inc. All righs reserved