Check it out
There are various ways to get documents into (and out of) BlueCamroo. The Library tab is the most obvious.
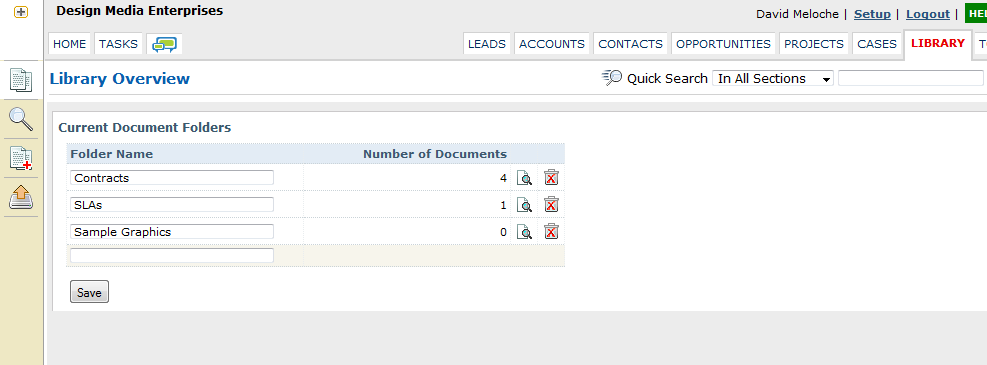
Click the tab and define folders under which you would like to organize documents. Click the folder's associated View button.
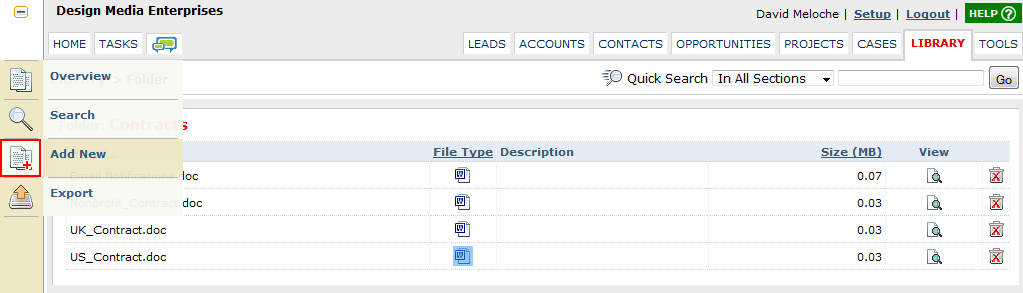
Click the Add New button on the Left toolbar. You can then browse and upload your document.
Documents can be any file type, from a Word doc to a PDF to images/video. Just remember your account has a storage cap so we would not suggest using it to store large files (like video/sound).
Once uploaded, you can click the file's associated View  button to download the file to your computer.
The Library tab is intended to maintain commonly used files and keep them in a centralized location for easy access by all. For example you might want to keep Word temples (standard contracts) or employee forms (vacation request).
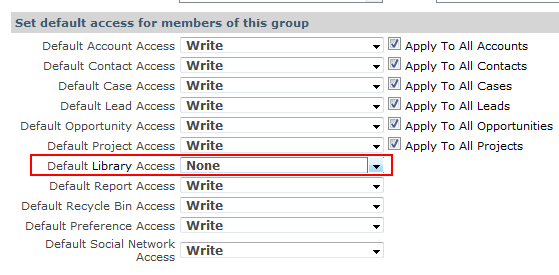
If you prefer to restrict access, that's no problem either. Just visit User or User Group rights under setup (Setup > System Setup > Company Setup > Access and Rights > User Groups).
To add documents specific to a record (e.g., a particular lead or account), open the record. The Left toolbar will have an Attachments button.
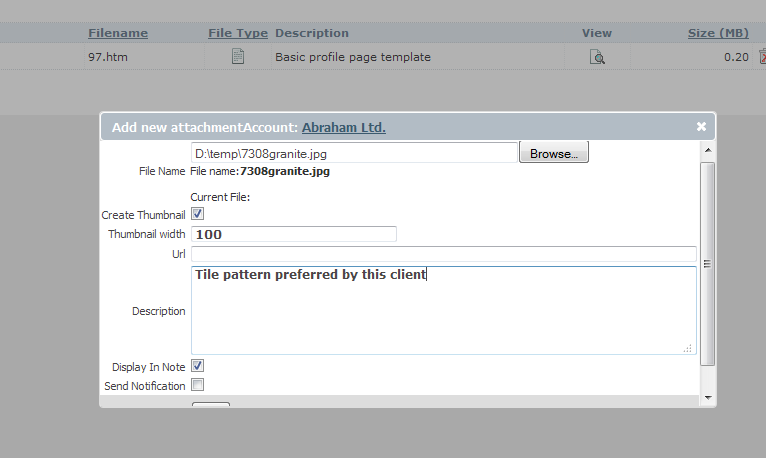
Click the Add New Attachment link to associate a file with this record. Note the Send Notifications checkbox. If you check this box, BlueCamroo will give you options to send an email to various internal users, alerting them that there is a new attachment.
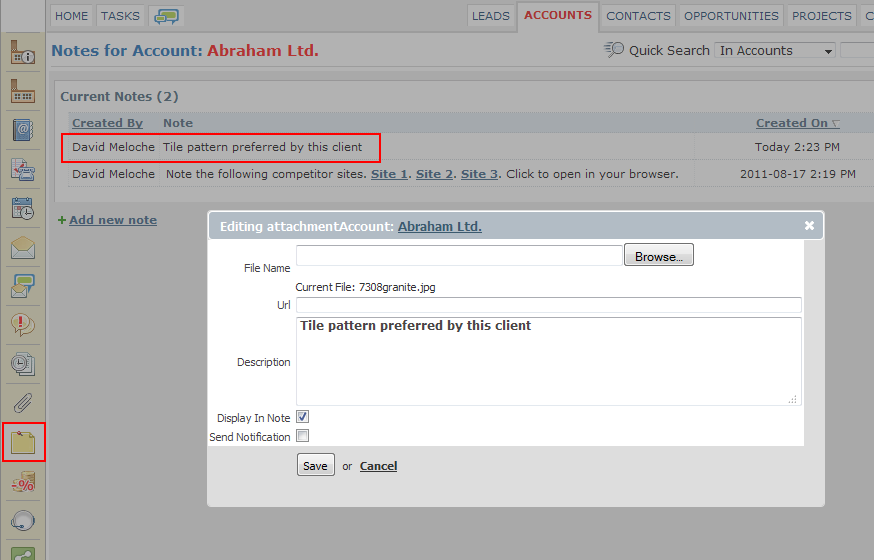
The Display in Note checkbox, if checked, will duplicate the Description text as a note associated with the record. You might want to do keep all such descriptions easily readable in one place.
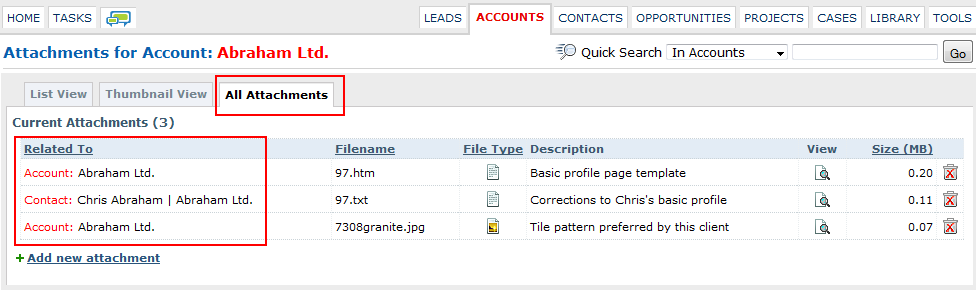
You'll also notice an All Attachments tab. Click that tab to see files attached to sub-records. For example, if a Case record under the Account record has its own attachment, you will see that listed here. It's a great way to manage all documents "in play".
If you download the file and edit it, you can click on the Filename, open its details dialog box, and use the Browse button to upload the updated file and overwrite the version stored on BlueCamroo.
Your heaviest use of documents will probably involve projects. A project has two ways of uploading and sharing documents. The Attachments button works the same as above.

The Documents button, however, gives you powerful source control features. Add a document in a fashion similar to adding an attachment. After uploading the document, BlueCamroo presents you with several new options.
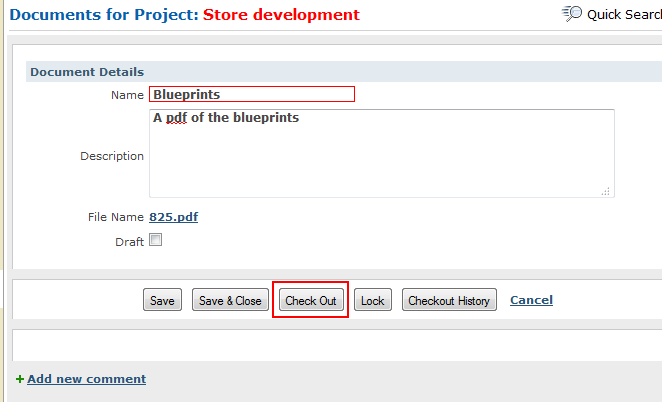
You'll note there's no Browse button. You cannot upload a file over top until you click the Check Out button. Clicking that will bring up a standard download box.
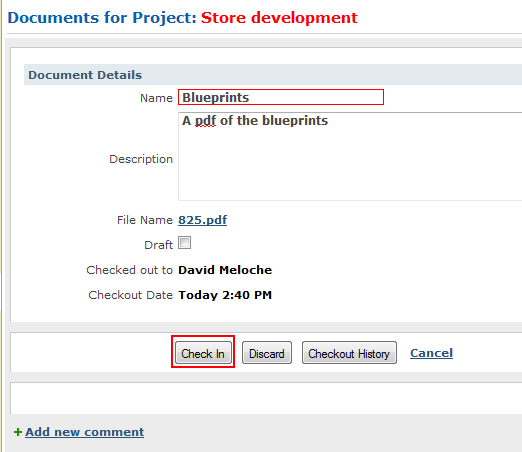
After downloading, the downloader is presented with two primary options. Click Check In upload the updated file. It's good to leave comments, helping other users understand what changes were made.
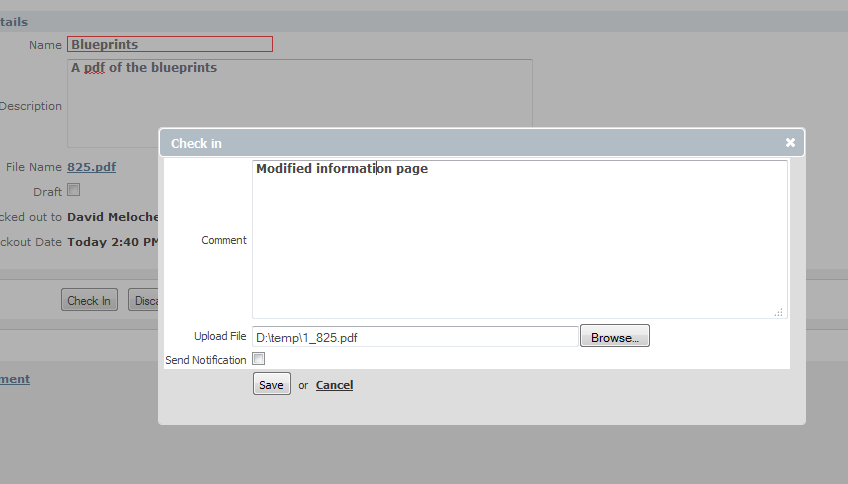
This dialog also has a Send Notification box, check that to alert users you've modified the file.
If you click Discard, BlueCamroo will reset the check in condition. The Lock button prevents users from checking in/checking out the document until unlocked.
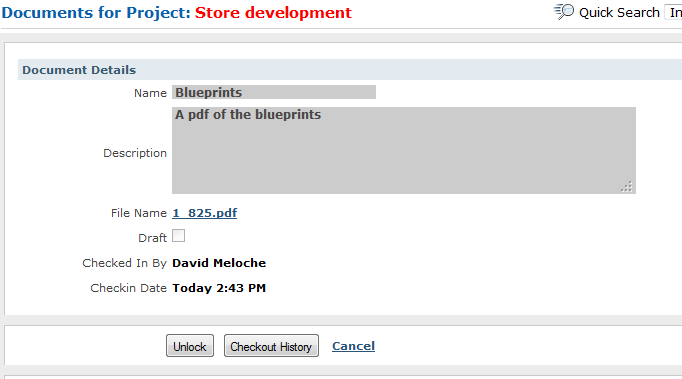
Now some might be asking what does this check out/check in procedure do other than add another step to downloading the document. Easy. Let's see what another user sees when they visit the Document page.
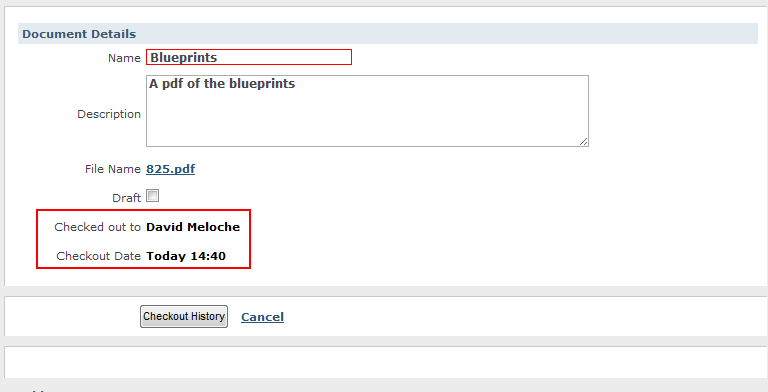
The user who has not checked out the document sees the document is locked. The user cannot download, edit, and upload the document until the user who has checked it out checks it back in.
The advantage here is this prevents two users from downloading and modifying the document at the same time, unaware another user is making modifications. Users don't overwrite each other's changes.
- Solution
- Pricing
- How Your Business Runs
- Developers
- API Documentation

©2026 BlueCamroo Inc. All righs reserved