BlueCamroo Release Notes 4.1.0
What's New in BlueCamroo?
In May BlueCamroo released a major revision of both the interface and underlying architecture. Our September release completes the process of fine tuning.
All customers who were using Version 3 are now fully migrated to Version 4.
Explorer Bar
Always Available

The Explorer Bar is now always available. However, to maximize the work area, we've removed the button labels and display just the icons. If you hover over the icons, you will see their labels. The functionality remains the same, however. Click an Explorer Bar button to expand the panels.
Optional Items
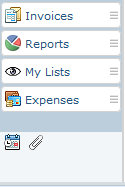
At the bottom of the Explorer Bar is an optional menu item tray. You can drag and drop these items onto your Explorer Bar and add them as clickable items with the same behavior as other Explorer Bar items (setting up views and searches).
The current optional items are Events and Attachments.
To add the items, you need to click the Explorer Bar Manage Menu Mode icon (found at the top of the Explorer Bar). In Manage Mode, drag and drop one of the optional items onto the Explorer Bar. You need to drop it between two existing items. You cannot drop it at the bottom of the items. When you're done click the Exit Manage Mode icon to accept the changes.
When in Manage Mode, you can also remove Explorer Bar items. If, for example, you don't want Sales Quotes or Invoices, you can drag and drop them onto the tray.
Form Fonts
Do not adjust your set. If the form fonts look bigger, it's because we're using a larger font to improve readability.
Navigation Changes
In addition to the Explorer bar always remaining available when you expand panels, we have made a few other changes to the way you navigate the interface.
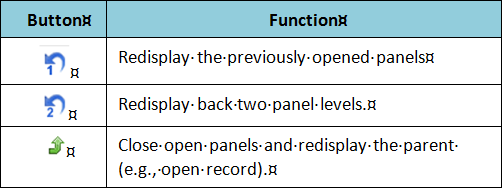
Panel Buttons
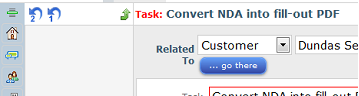
The return buttons on top of the panels have been modified. See the table below for the function:
Closing Details Panels
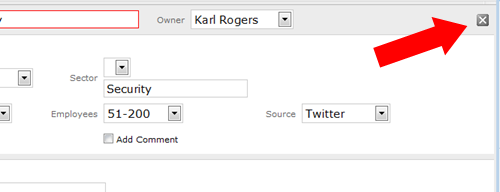
When you open a record Details panel, you can now close the panel with a right Close button.
Toolbar Changes

The Today icon has been changed and the Quick Search button has been removed.
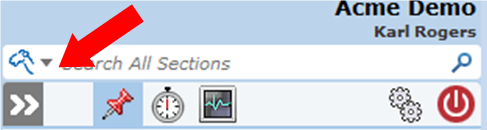
Quick Search is now available as an always available search field over the Information Panel's toolbar. To search a specific section, click the down arrow to drop-down a list of available sections.
Social Networks
You can now add multiple social networks to your personal and company setup. In other words, if you have, say, multiple Twitter accounts or multiple Facebook accounts (say, one personal profile and one professionally facing), you can now add them by visiting your My Social Networks page or System Setup's Social Networks page.
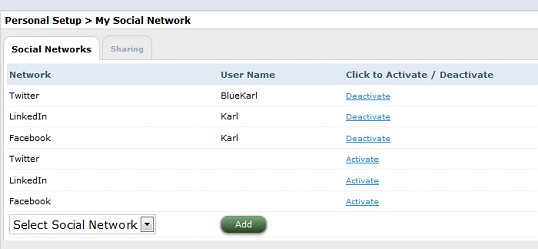
Click the Add button and add the additional accounts. Remember to click Activate and then login to the appropriate social network account.
When posting via Social Scout, these additional profiles will be available via a popup menu.
Social Network Account Matching
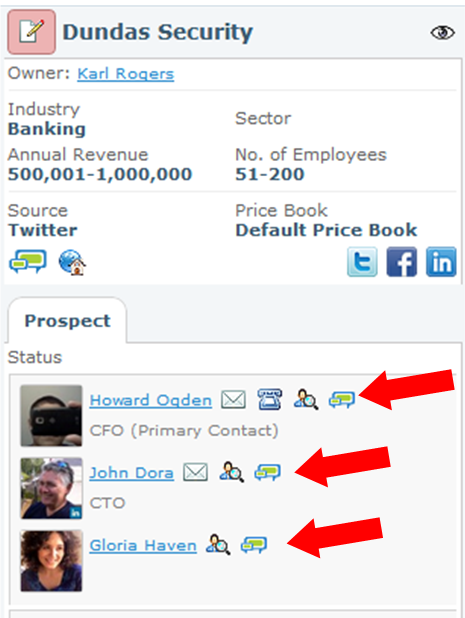
Person and Organization records can be associated with social networks (Twitter, LinkedIn, Facebook). Previously, you entered these social network IDs/URLs via the record's Details page. A record's social networks are now configured via the record's own Social Message page.
You can access it by clicking the record's Social Message icon on the Information Panel.
Opening the Social Message page, BlueCamroo will present you with possible social network account matches. You can use the match or click Next four times (cycling through the five most likely matches). If none of the profiles match, you can manually enter the social network ID/URL if you know it. If you close the matching and reopen, BlueCamroo will present you with five more matches.
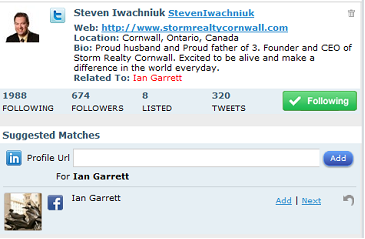
After registering the social networks, the Social Message page gives you a unified feed of their social network activity.
Import
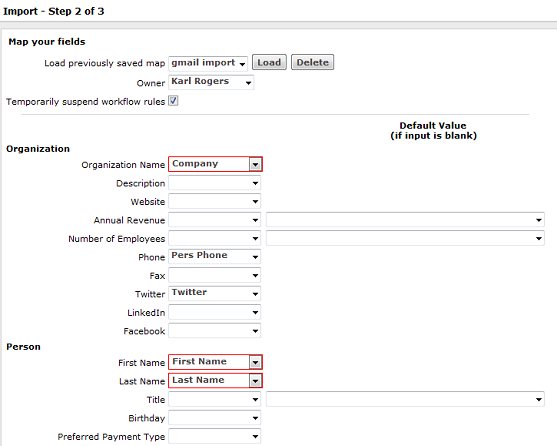
We've reorganized the cell mapping in Step 2 of the import. The organization makes it clearer and gives you more control where (which record type) your contact data gets imported to.
Find Location with Google Maps
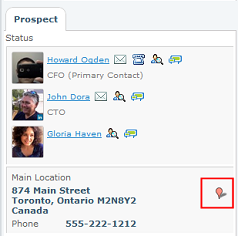
Address fields on the Information Panel now feature a Google Map icon. Click the icon to open a Google Map tab with the location mapped.
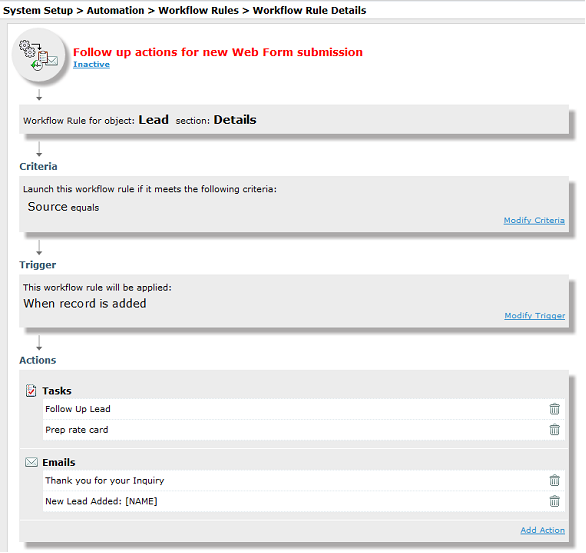
Visual Project Templates and Workflow Rules
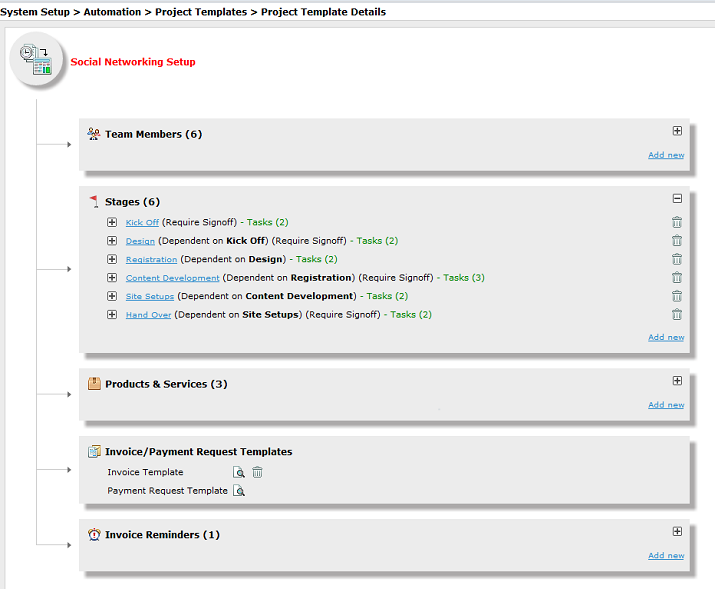
The setup of Project Templates and Workflow Rules has been improved with a more visual approach. The new visual screens help group options and convey the step based approach to setting up a template or workflow rule. The actual functionality is, however, unchanged.
Relationship Graphs
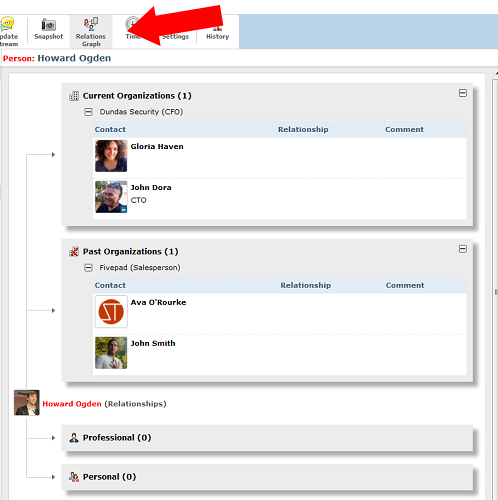
Clicking the Relationship Graph icon allows you to track and visuals relationships between people entered into BlueCamroo. Relationships between Person records are now organized via four relationship types:
1.
Current Organizations
2.
Past Organizations
3.
Professional Relationships (outside of any organizations)
4.
Personal (friends/family)
These relationships are now visually graphed. Relationships are automatically detected if you have setup reciprocal relationship types under the Relationship Types lookup value (Setup >System Setup > Lookup Values > Relationship Types).
Use Campaign Manager for Free with Your STMP Service
You can now use your own SMTP email server to serve BlueCamroo Campaign Manager emails. Emails sent via your own server do not count against your BlueCamroo Campaign Manager email credits.
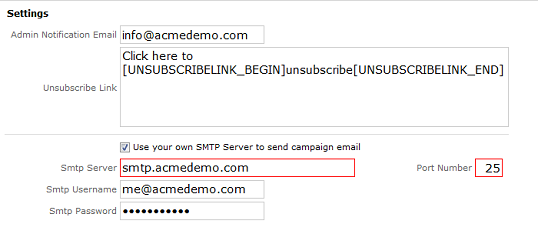
To set up Campaign Manager for use with your mail server, click the Campaign Manager button on the Toolbar. Click the Setup button and then click the Config button. Check the Use your own SMTP Server to send campaign email checkbox and complete the SMTP setup fields. Consult with your network administrator for details if you do not know your server, username, and password.
