BlueCamroo Release Notes 4.1.2
What's New in BlueCamroo?
We've enhanced the Explorer Bar and Update Stream. The Explorer Bar now allows you to set up default views and default pop-out behaviors for easier navigation. Commenting and managing the Update Stream has been refined. Also we've made our Web-to-Lead form more spam resistant. See the Release Notes section on Web-to-Lead to see modifications you can make to your existing code to filter out spambot submissions.
Explorer Bar
Button Labels
Some users requested labeling on the Explorer Bar buttons. To avoid robbing useful real estate from the center pane, we've created a "best of both worlds" Explorer Bar that pops out the labels upon hovering over any button.
Explorer Bar “Auto-Pop”
Finding data using the Explorer Bar used to require at least 2 clicks: first on the button, then on the chosen View. To save a click, when you click the Explorer Bar now, the View that you most recently used (or the Default View, if you’ve just logged in) will “auto-pop” – i.e. the view and list expand automatically.
New View Options
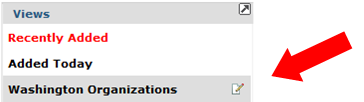
To save another click for users who prefer to see Explorer Bar results in Grid View, we’ve added an option on Views to select your preferred results format: List or Table.
Click the Edit icon associated with the custom view for which you want to setup a default results format.
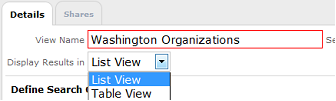
Use the Display Results in drop-down box to set how this view should pop-out when selected. Set List View if you want the view results to pop out as a simple list (the default behavior). Set Table View to show the "grid" view that would normally appear only after clicking the list results' Grid icon.
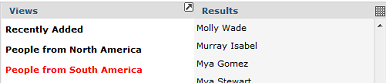
List View
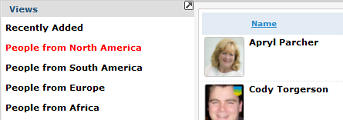
Table View
If you find one of your custom views is used most often and you would like that results pane to pop out as the initial default view, click the Edit icon associated with the custom view you want to immediately pop out.
After clicking the Edit icon you will see the Set as Default View checkbox.

Check the Set as Default View box. Restart your browser. Next time you click on the view's corresponding Explorer Bar button, the selected default view will immediately expand. If you select another view as the default, you do not have to uncheck the previously selected view. BlueCamroo will deselect it in the background.
Update Stream
Comments
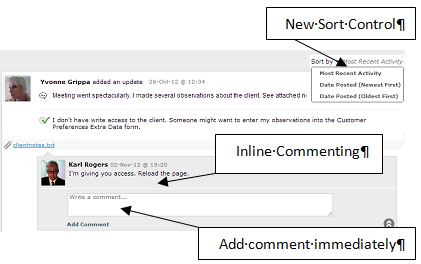
Comments to updates are now displayed "inline". Previously they were behind a pop-out window. The new inline format ensures comments stand out more, do not get buried, and encourage more discussion.
A comment thread can be hidden using the Roll Up icon. You will see a "comment bubble" indicating how many hidden comments there are.
To reveal hidden comment or add a new comment when comments are "rolled up", click the comment bubble.

New Sort Control
The previous Update Stream displayed updates in order of last modification. The stream post with the most recent comments was ordered to the top. You can now sort update stream posts in three ways:
Most Recent Activity: The default behavior. The update with the most recent comments appears at the top.
Date Posted (Newest First): Updates are ordered only by posting date (without regard to commenting activity). The most recent updates appear first.
Date Posted (Oldest First): Updates are ordered only by posting date (without regard to commenting activity). The oldest updates appear first.
Comment to Update Stream Via Email
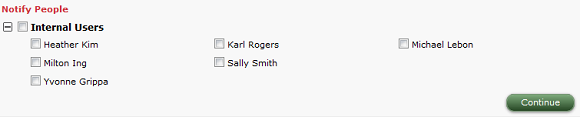
Users included in a status update via the Notify option will receive an email about the original update. Users will likewise receive emails when any additional comments are added to the update. What’s more, BlueCamroo now lets a user reply to the email and have the comment posted direct.
Ensure, you do not modify the reply's To email. BlueCamroo will only post text in the body of the email as a comment. Text in the Subject line and attachments are ignored.
Status Update Templates
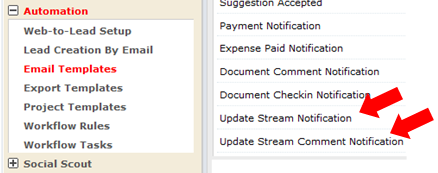
Review the Update Stream Notification and Update Stream Comment Notification templates in Setup's Email Templates section (Setup > System Setup > Automation > Email Templates). These templates control the look and content of the Update Stream notification emails.
New Placeholders
Two important placeholders have been added to the Update Stream Notification template and the Update Stream Comment Notification template.
A [SHARE_WITH] placeholder will identify if the update or update comment is shared only internally or externally with customers/suppliers. Users who might comment to the stream via email should be aware if their comments will be visible by clients. A [NOTIFIED_TO] placeholder will indicate exactly who is receiving these notification emails.
Web-to-Lead
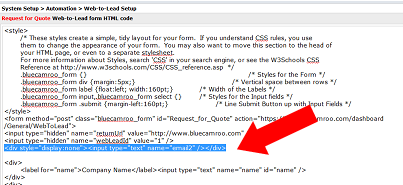
Web-to-Lead forms now generate some extra code to help defend against spambots that fill out comment forms and submit them automatically. In all newly generated Web-to-Lead forms, there is a "trap" field inserted. The code looks like this:
<div style="display:none"><input type="text" name="email2" /></div>
This is hidden from human users ("display:none"), but visible to bots, who will fill it in. Any form with this field filled in is discarded by BlueCamroo, and not added as a lead.
You should not delete this feature, which will appear in all new Web-to-Lead forms (unless you really like form spam).
For your existing Web-to-Lead forms, access Setup System Setup > Automation > Web-to-Lead Setup. Open your existing Web-to-Lead items and click Generate Form Code. Copy the form code, access your old Web-to-Lead form code on your live web page, and replace it with the new, copied form code.
You can by-pass that step and access the code directly in your live web page and paste this line:
<div style="display:none"><input type="text" name="email2" /></div>
Paste it after:
<input type="hidden" name="webLeadId" value="somevalue" />
Note: Somevalue will be the automatically generated ID value of this particular Web-to-Lead form code.
Adding Products to a Project
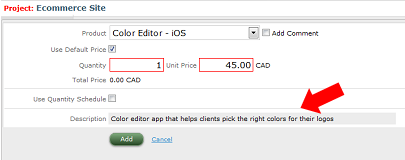
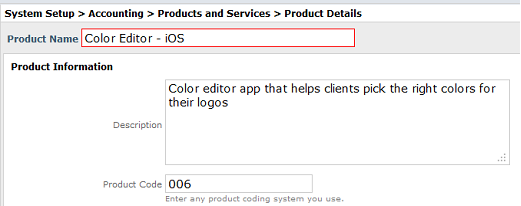
When you add a product to a project, BlueCamroo will now add a description field and populate it with the description added under the product's Products and Services setup page (Setup > System Setup > Accounting > Products and Services > Product Details).