Getting Paid Part 2
Last week we looked at how BlueCamroo generates invoices and issues notifications to clients that an invoice is ready to be paid. This post will look at how you can use BlueCamroo to facilitate both online and offline payments.
To review, your contact (the one flagged as being the one to receive an invoice) has been emailed a pdf of the invoice. Your contact can pay the traditional route (a check or a phone credit card transaction). Or your client can access the BlueCamroo client Intranet, view the invoice, and then pay online.
Let's say your client has paid via the traditional route. You've received a check or a phone-in credit card transaction as payment. You would then access the project's Products and Invoice page.

Click on the invoice to bring up the edit box, and then complete the following fields:
Payment Amount: Enter how much of the invoice was paid.
Payment Date: What day the invoice was paid.
Payment Method: Select which payment method the client used from this drop-down box.
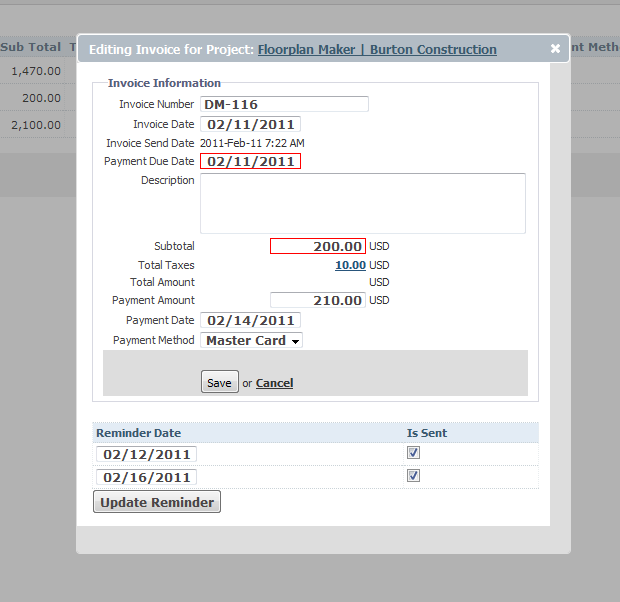
You might also notice BlueCamroo completes the Is Sent check boxes when it sends out the notification emails.
After completing those fields, simply click Save. (Don't click Update Reminder.)
Give Accounting Invoice Access
Let's say you're the project manager but you're not the accounts payable person. It's nice that the money is rolling in but your specialty isn't on the accounting side. You clearly want to give your accounts person access to this project to update the invoice but the accounts person does not need to know many details about the project. Giving these kinds of granular rights is both a snap and automatic in BlueCamroo.
First, visit Setup's System Setup | Company Setup | Access and Rights | User Groups.
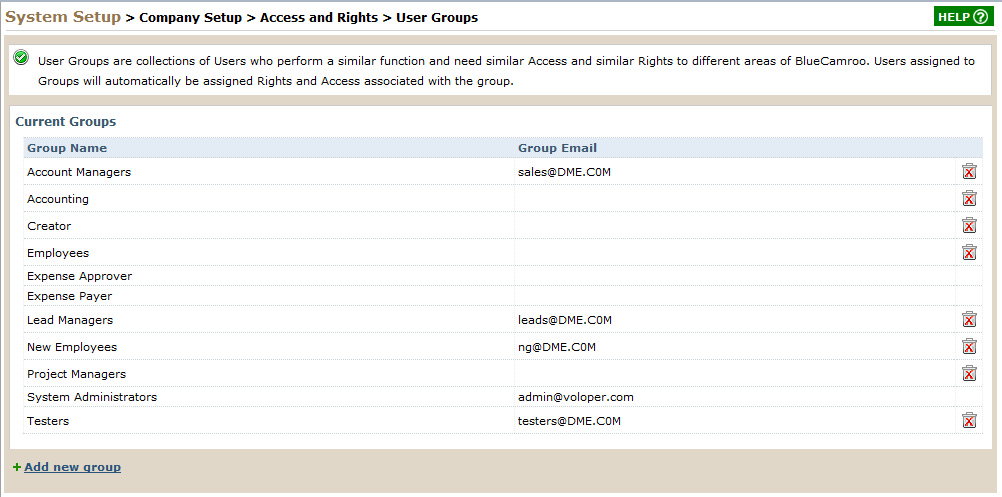
Ensure you have two user groups set up. One for Project Managers or Owners (i.e., a group that has full control over a project) and one for the accounts receivable person. So, say, an Accounting group. Add the person who processes payments to the Accounting group.
Now visit System Setup | Company Setup | Access and Rights | Projects Share Permissions.
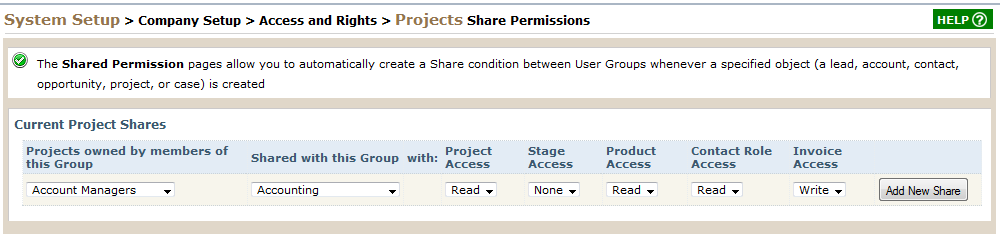
You'll set up an automatic sharing condition. Any time a project is created and owned by a member of the Project Managers group, it's shared automatically with the users in the Accounting group. Using the access drop-down boxes, you can portion the proper rights to the users in the Accounting group. For example, you can give them Write access to Invoices. They'll need that to modify the invoice. You might always want to give them Read access to Contact Roles and Projects so they can view certain contact particulars. Click Add New Share to set the actual condition.
So, think about it this way. Tina is a project manager. Henry is the accounts receivable person. Tina creates a new project. Tina gets full write access to her project. Since Henry is part of the Accounting group, he now gets automatic access to Tina's project BUT his rights are limited to the invoice and details about the project and contacts.
Online Payments
BlueCamroo supports online payments. Your account contact can log into the Intranet side and pay online. Before you offer online payments, you need to setup either a Moneris or Paypal vendor account. Once you've set up an account with either of these two services, you'll be given a raft of payment processor IDs, passwords, and the like.
Take your merchant particulars and visit System Setup | Company Setup | Accounting Setup | Payment Processor Setup. Select either PayPal or Moneris from the drop-down box and then enter the specific details. Click Save.
BlueCamroo is now ready to process online payments but you have to give clients access to the online payment page. The way to typically do this is have them visit the Intranet. The visit your BlueCamroo domain (e.g., mycompany.bluecamroo.com) and login with an email and password just like an internal user. However, as contacts, they're presented with the Intranet front end.
To give contacts access, visit Setup's System Setup | Company Setup | Access and Rights | Users.
Click Add New External User. While BlueCamroo bills based on the number of internal users, you're effectively unlimited in the number of external users you can add. Depending on plan, you can add between 15,000 and 150,000 external users. So, room to grow.
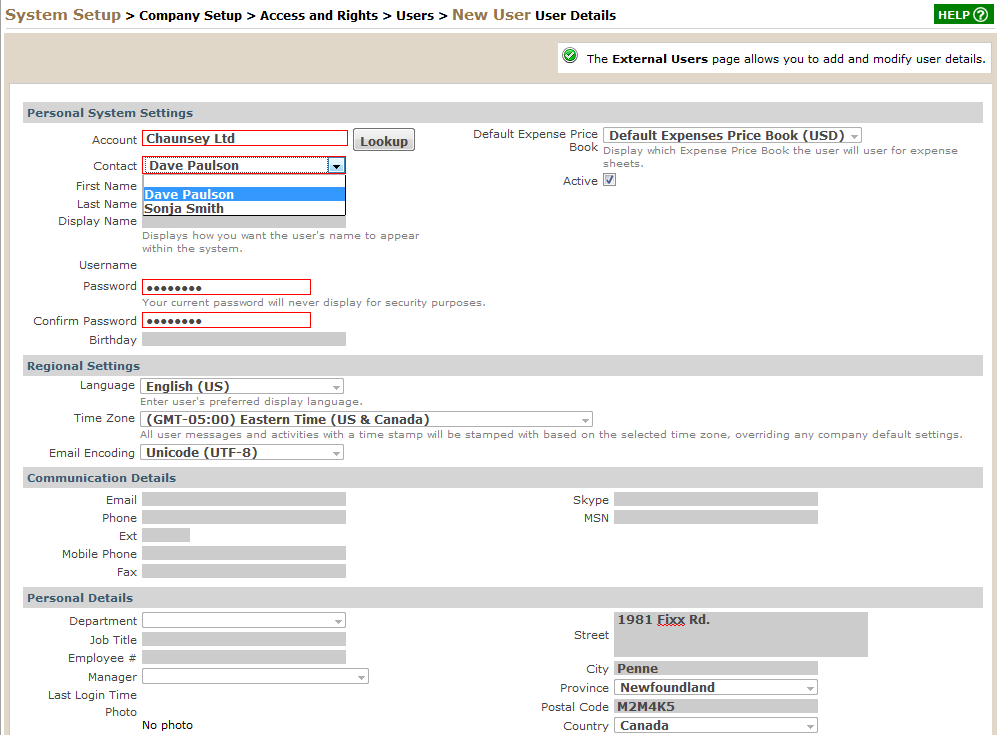
You'll notice when you click add, many of the External user fields are grayed out. BlueCamroo will only accept account contacts as External users. If you're trying to add an External user who is not currently an account contact, first add him/her as a contact.
To add a contact as an external user, look up the contact's account and enter the account in the Account field. The Contact drop-down box will populate with the known account contacts. Select the desired contact. Select a password for the External User. You'll have to communicate this password to the contact via email or some other secure means. As well, let the client know the email that appears on their Contact Details page is the email they use to log into the Intranet.
Finally, if your plan is to have clients log into an Intranet, you're going to want to have an Intranet for them to log into. Under Setup access System Setup | Client Intranet Setup | Intranet Templates. If you have BlueCamroo setup for multiple languages, you'll see a template for each language. Click on the language you want to edit. This template controls the over all header/footer and body wrapper of each page. Where you see the [BODY_CONTENT] placeholder, BlueCamroo will render the proper Intranet pages.
Click each of the Intranet Pages options to further define the look and feel of what gets rendered per Intranet page.
On the client side, the client will receive the invoice PDF. The client can pay by traditional means or log into mycompany.bluecamroo.com (where mycompany is your actual company domain portion) using his/her registered email and password.
The client can click the Invoices tab. He/she will see a list of outstanding invoices.
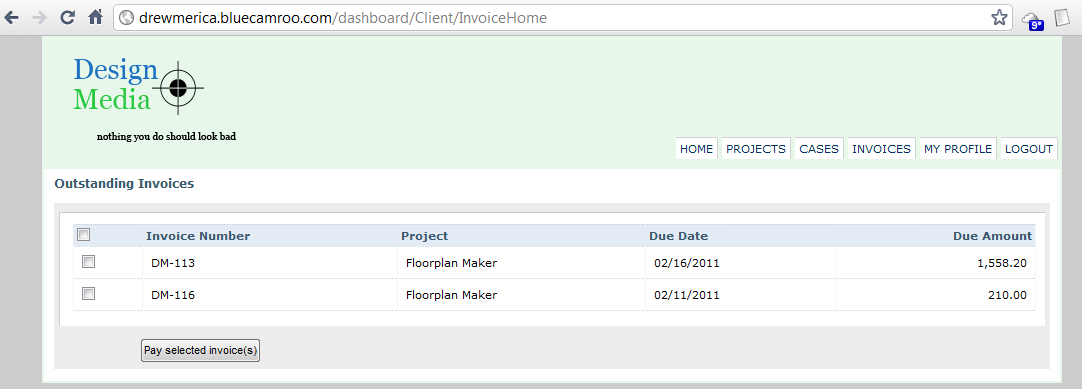
The client can select an invoice to pay and then click Pay Selected Invoice(s).
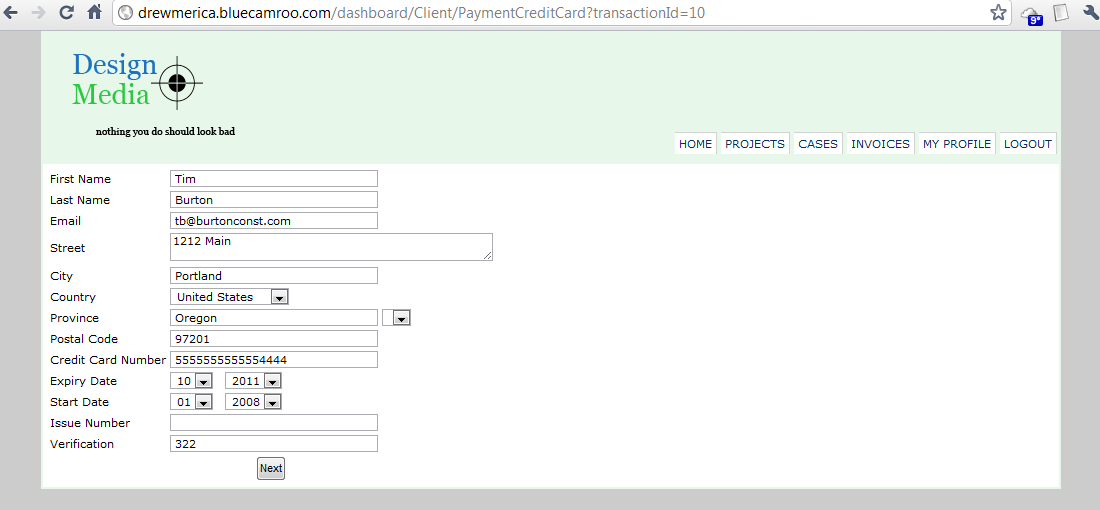
Via a secure (https) page, the client can enter credit card information. After clicking Next, the client can verify the transaction. Finally, the client can click Process Transaction.
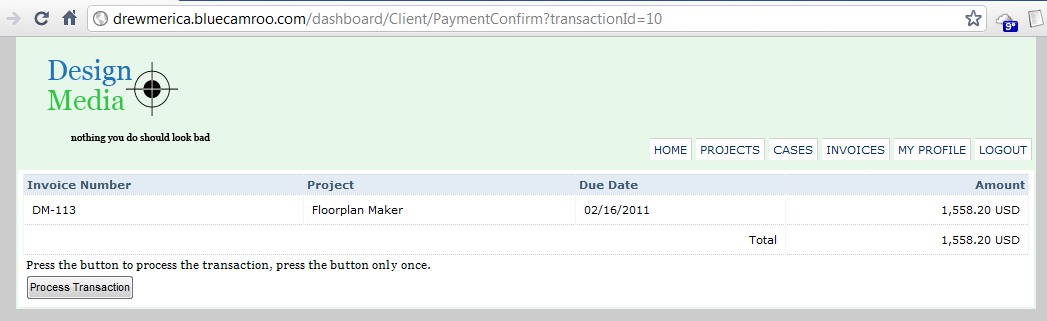
BlueCamroo will submit the payment information to either your PayPal vendor service or your Moneris gateway.
Once the client pays the invoice, BlueCamroo then automatically sets the invoice as paid. You don't have to go in manually and set the invoice as paid. Also, BlueCamroo generates a notification email to the client saying thank you for the payment and provides certain payment information. You can configure this under Setup. Open System Setup | Company Setup | Automation | Payment Notification.
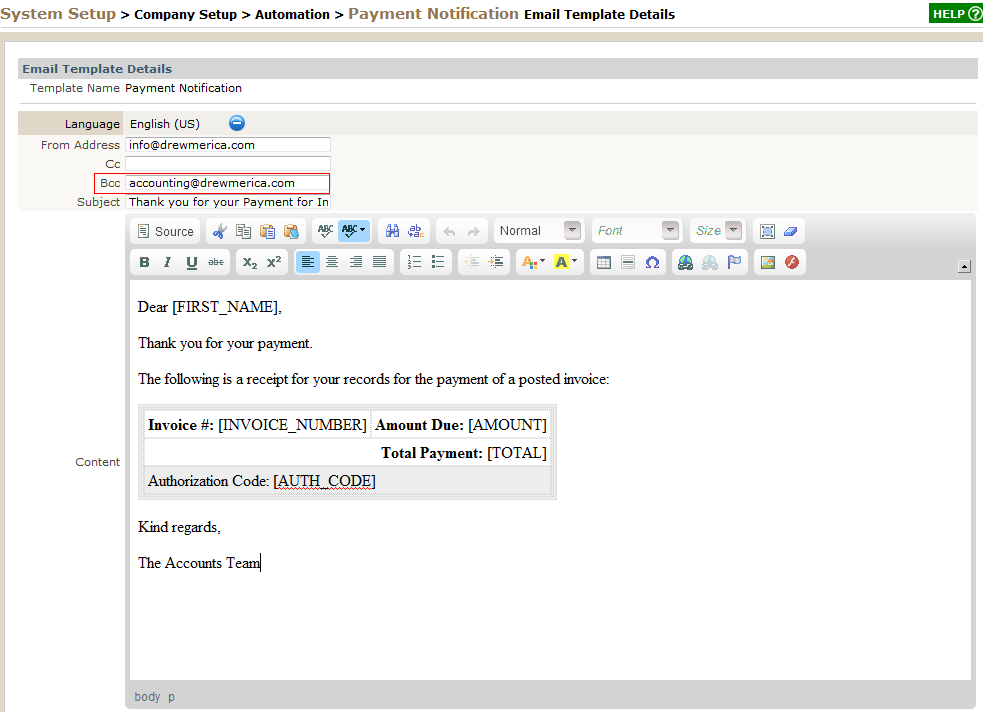
Edit the notification email template as you see fit. Note the Bcc field. If you want to get notified via email that a client has made a payment, enter your email in the Bcc field. This will blind copy the email to you.
